Webhooks

What Are Webhooks?

Webhooks are a powerful tool that allows you to receive notifications about specific events or actions without the need for periodic API calls. By subscribing to webhooks, you can automate your app’s operations and trigger custom actions based on these events. For example, you can use webhooks to receive notifications when a customer adds a product to their cart or creates a new order. By subscribing to these webhooks, you can easily stay informed and execute your own code based on these actions.

Registering Webhooks

To register webhooks with WebCommander, you need to provide two pieces of information: the sourceUrl and the eventName. WebCommander will then trigger an action based on the specified event name and call the URL provided in the source URL. This URL can be one of your app’s endpoints where you have implemented the necessary code to handle the webhook and perform the desired operation.

Here is an example of how to register webhooks with WebCommander:

"webhooks": [
    {
      "sourceUrl": "https://yourapp.com/api/v1/cart/added-to-cart", // The url WebCommander will call when firing this hook
      "eventName": "added-to-cart", // A webhook event name. Check Webhook list to find details
      "renderScope": "", // Required for script tags
      "accessType": "webhook" // A data access type to define which way your plugin collecting data.    
    }
  ],

By leveraging webhooks, you can streamline your app’s processes, avoid unnecessary API calls, and enable real-time integration with external systems.

Installation

To register webhooks for a site using the /install endpoint in WebCommander, you’ll need to provide a list of event names and source URLs. Below is an example response format that illustrates how to set up webhooks:

{
  "webhooks": [
    {
      "sourceUrl": "https://yourapp.com/api/v1/cart/added-to-cart",
      "eventName": "added-to-cart",
      "renderScope": "",
      "accessType": "webhook"
    }
  ],
  "scriptTag": [
    {
      "sourceUrl": "https://yourapp.com/assets/js/script-tag.js",
      "eventName": "",
      "renderScope": "All",
      "accessType": "scriptTag"
    }
  ]
}

Example

  • cURL
  •  PHP – cURL
  • Python – http.client
  • Java – Unirest
  • C# – RestSharp
curl --location 'https://yourapp.com/api/v1/cart/added-to-cart?uuid=F8A3-A88E-C6EF-B1CB' \
--header 'Content-Type: application/json' \
--data-raw '{
    "hook_name": "added-to-cart",
    "hook_Data": {
        "cartItems": [
            {
                "firstName": "second",
                "lastName": "Test",
                "email": "test1fdsfe4@mailinator.com"
            },
            {
                "eventId": "C60B89F8-3A90-4DED-937D-DD62867859E2",
                "value": 27.5,
                "items": [
                    {
                        "ProductID": "15",
                        "SKU": "PRODUCT-7E2BEE252B07",
                        "ProductName": "Vegetarian Pasta",
                        "Quantity": 1,
                        "ItemPrice": 27.5,
                        "RowTotal": 27.5,
                        "ProductURL": "http://localhost:1301/product/vegetarian-pasta-1",
                        "ImageURL": "http://localhost:8080resources/00000000/product/product-15//vegetarian-pasta.png"
                    }
                ]
            }
        ]
    }
}'
<?php

$curl = curl_init();

curl_setopt_array($curl, array(
  CURLOPT_URL => 'https://yourapp.com/api/v1/cart/added-to-cart?uuid=F8A3-A88E-C6EF-B1CB',
  CURLOPT_RETURNTRANSFER => true,
  CURLOPT_ENCODING => '',
  CURLOPT_MAXREDIRS => 10,
  CURLOPT_TIMEOUT => 0,
  CURLOPT_FOLLOWLOCATION => true,
  CURLOPT_HTTP_VERSION => CURL_HTTP_VERSION_1_1,
  CURLOPT_CUSTOMREQUEST => 'POST',
  CURLOPT_POSTFIELDS =>'{
    "hook_name": "added-to-cart",
    "hook_Data": {
        "cartItems": [
            {
                "firstName": "second",
                "lastName": "Test",
                "email": "test1fdsfe4@mailinator.com"
            },
            {
                "eventId": "C60B89F8-3A90-4DED-937D-DD62867859E2",
                "value": 27.5,
                "items": [
                    {
                        "ProductID": "15",
                        "SKU": "PRODUCT-7E2BEE252B07",
                        "ProductName": "Vegetarian Pasta",
                        "Quantity": 1,
                        "ItemPrice": 27.5,
                        "RowTotal": 27.5,
                        "ProductURL": "http://localhost:1301/product/vegetarian-pasta-1",
                        "ImageURL": "http://localhost:8080resources/00000000/product/product-15//vegetarian-pasta.png"
                    }
                ]
            }
        ]
    }
}',
  CURLOPT_HTTPHEADER => array(
    'Content-Type: application/json'
  ),
));

$response = curl_exec($curl);

curl_close($curl);
echo $response;
import http.client
import json

conn = http.client.HTTPSConnection("yourapp.com")
payload = json.dumps({
  "hook_name": "added-to-cart",
  "hook_Data": {
    "cartItems": [
      {
        "firstName": "second",
        "lastName": "Test",
        "email": "test1fdsfe4@mailinator.com"
      },
      {
        "eventId": "C60B89F8-3A90-4DED-937D-DD62867859E2",
        "value": 27.5,
        "items": [
          {
            "ProductID": "15",
            "SKU": "PRODUCT-7E2BEE252B07",
            "ProductName": "Vegetarian Pasta",
            "Quantity": 1,
            "ItemPrice": 27.5,
            "RowTotal": 27.5,
            "ProductURL": "http://localhost:1301/product/vegetarian-pasta-1",
            "ImageURL": "http://localhost:8080resources/00000000/product/product-15//vegetarian-pasta.png"
          }
        ]
      }
    ]
  }
})
headers = {
  'Content-Type': 'application/json'
}
conn.request("POST", "/api/v1/cart/added-to-cart?uuid=F8A3-A88E-C6EF-B1CB", payload, headers)
res = conn.getresponse()
data = res.read()
print(data.decode("utf-8"))
Unirest.setTimeouts(0, 0);
HttpResponse<String> response = Unirest.post("https://yourapp.com/api/v1/cart/added-to-cart?uuid=F8A3-A88E-C6EF-B1CB")
  .header("Content-Type", "application/json")
  .body("{\r\n    \"hook_name\": \"added-to-cart\",\r\n    \"hook_Data\": {\r\n        \"cartItems\": [\r\n            {\r\n                \"firstName\": \"second\",\r\n                \"lastName\": \"Test\",\r\n                \"email\": \"test1fdsfe4@mailinator.com\"\r\n            },\r\n            {\r\n                \"eventId\": \"C60B89F8-3A90-4DED-937D-DD62867859E2\",\r\n                \"value\": 27.5,\r\n                \"items\": [\r\n                    {\r\n                        \"ProductID\": \"15\",\r\n                        \"SKU\": \"PRODUCT-7E2BEE252B07\",\r\n                        \"ProductName\": \"Vegetarian Pasta\",\r\n                        \"Quantity\": 1,\r\n                        \"ItemPrice\": 27.5,\r\n                        \"RowTotal\": 27.5,\r\n                        \"ProductURL\": \"http://localhost:1301/product/vegetarian-pasta-1\",\r\n                        \"ImageURL\": \"http://localhost:8080resources/00000000/product/product-15//vegetarian-pasta.png\"\r\n                    }\r\n                ]\r\n            }\r\n        ]\r\n    }\r\n}")
  .asString();
var options = new RestClientOptions("")
{
  MaxTimeout = -1,
};
var client = new RestClient(options);
var request = new RestRequest("https://yourapp.com/api/v1/cart/added-to-cart?uuid=F8A3-A88E-C6EF-B1CB", Method.Post);
request.AddHeader("Content-Type", "application/json");
var body = @"{
" + "\n" +
@"    ""hook_name"": ""added-to-cart"",
" + "\n" +
@"    ""hook_Data"": {
" + "\n" +
@"        ""cartItems"": [
" + "\n" +
@"            {
" + "\n" +
@"                ""firstName"": ""second"",
" + "\n" +
@"                ""lastName"": ""Test"",
" + "\n" +
@"                ""email"": ""test1fdsfe4@mailinator.com""
" + "\n" +
@"            },
" + "\n" +
@"            {
" + "\n" +
@"                ""eventId"": ""C60B89F8-3A90-4DED-937D-DD62867859E2"",
" + "\n" +
@"                ""value"": 27.5,
" + "\n" +
@"                ""items"": [
" + "\n" +
@"                    {
" + "\n" +
@"                        ""ProductID"": ""15"",
" + "\n" +
@"                        ""SKU"": ""PRODUCT-7E2BEE252B07"",
" + "\n" +
@"                        ""ProductName"": ""Vegetarian Pasta"",
" + "\n" +
@"                        ""Quantity"": 1,
" + "\n" +
@"                        ""ItemPrice"": 27.5,
" + "\n" +
@"                        ""RowTotal"": 27.5,
" + "\n" +
@"                        ""ProductURL"": ""http://localhost:1301/product/vegetarian-pasta-1"",
" + "\n" +
@"                        ""ImageURL"": ""http://localhost:8080resources/00000000/product/product-15//vegetarian-pasta.png""
" + "\n" +
@"                    }
" + "\n" +
@"                ]
" + "\n" +
@"            }
" + "\n" +
@"        ]
" + "\n" +
@"    }
" + "\n" +
@"}";
request.AddStringBody(body, DataFormat.Json);
RestResponse response = await client.ExecuteAsync(request);
Console.WriteLine(response.Content);

Hook Parameter

Hook parameters are the set of data that WebCommander will send you with the Hook name and the data related to the fired hook. Example:

{
    "hook_name": "added-to-cart",
    "hook_Data": {
        // Check Webhooks list for sample hook data
    }
}
API Access Scopes for Plugin

When developing plugins for WebCommander, it’s essential to understand how to request access to specific store data during the app installation process. This guide focuses on API access scopes, which determine the boundaries and permissions of your plugin within the WebCommander ecosystem.

During installation, you must specify which parts of the system your plugin can access. This helps maintain the security and integrity of WebCommander stores. Below is an example of how to define API access scopes during installation:

{
    "apiAccessScopes": [
        "discount_profile",
        "customer_create",
        "customer_orders"
    ]
}

In this example, the plugin developer has requested access to specific scopes: discount_profile, customer_create, and customer_orders. As a result, the plugin can only read and write data related to these modules. Access to product data is not granted because it was not included in the installation scope.

Example Installation Configuration

Here is a complete example of an installation configuration, including WebHooks, Script Tags, and API access scopes:

{
  "webhooks": [
    {
      "sourceUrl": "https://yourapp.com/api/v1/cart/added-to-cart", // The url WebCommander will call when firing this hook
      "eventName": "added-to-cart", // A webhook. Check Webhook list to find details
      "renderScope": "", // Required for script tags
      "accessType": "webhook" // A data access type to define which way your plugin collecting data.    
    }
  ],
  "scriptTag": [
    {
      "sourceUrl": "https://yourapp.com/assets/js/script-tag.js", // The JS file URL webcommander will render in the head where you can manipulate its dom/data through JS code. Also possible to customise css.  
      "eventName": "", // Not required for Script Tags.
      "renderScope": "All", //Required for script tags. Values: "All/Specific page url"
      "accessType": "scriptTag" // A data access type to define which way your plugin collecting or manipulating data.
    }
  ],
  "apiAccessScopes": [
        "discount_profile",
        "customer_create",
        "customer_orders"
    ]
}

API Access Scopes List

ScopeAccess API
customer_Registration_Fieldshttp://yourapp.com/external/app/access/customer-create
email_statushttp://5289d153.wc-stage.webcommander.com/external/app/access/email-status
email_enable_disablehttp://5289d153.wc-stage.webcommander.com/external/app/access/email-enable-disable
discount_profilehttp://5289d153.wc-stage.webcommander.com/external/app/access/discount-profile
customershttp://yourapp.com/external/app/access/customers
customer_createhttp://yourapp.com/external/app/access/customer-create
customer_deletehttp://yourapp.com/external/app/access/customer-delete
customer_paymentshttp://yourapp.com/external/app/access/customer-payments
customer_updatehttp://yourapp.com/external/app/access/customer-update
customerhttp://yourapp.com/external/app/access/customer
customer_ordershttp://yourapp.com/external/app/access/customer-orders
update_customer_billing_addresshttp://yourapp.com/external/app/access/update-customer-billing-address
update_customer_shipping_addresshttp://yourapp.com/external/app/access/update-customer-shipping-address
update_customer_store_credithttp://yourapp.com/external/app/access/update-customer-store-credit
productshttp://yourapp.com/external/app/access/products
create_producthttp://yourapp.com/external/app/access/create-product
producthttp://yourapp.com/external/app/access/product
update_producthttp://yourapp.com/external/app/access/update-product
delete_producthttp://yourapp.com/external/app/access/delete-product
product_stock_updatehttp://yourapp.com/external/app/access/product-stock-update
product_price_updatehttp://yourapp.com/external/app/access/product-price-update
product_image_addhttp://yourapp.com/external/app/access/product-image-add
product_image_deletehttp://yourapp.com/external/app/access/product-image-delete
ordershttp://yourapp.com/external/app/access/orders
orderhttp://yourapp.com/external/app/access/order
order_createhttp://yourapp.com/external/app/access/order-create
change_order_statushttp://yourapp.com/external/app/access/change-order-Status
order_comment_addhttp://yourapp.com/external/app/access/order-comment-add
order_payment_refundhttp://yourapp.com/external/app/access/order-payment-refund
change_order_payment_statushttp://yourapp.com/external/app/access/change-order-payment-status
make_order_paymenthttp://yourapp.com/external/app/access/make-order-payment
payment_gatewayshttp://yourapp.com/external/app/access/payment-gateways
update_payment_gatewayhttp://yourapp.com/external/app/access/update-payment-gateway

How to Render a Manage Page

When a client installs your WebCommander plugin, the platform will call the root URL of your site and render the page through an iframe as the plugin’s manage page. To ensure your plugin works seamlessly within the WebCommander ecosystem, it’s recommended to develop your root URL as a page that provides all the necessary plugin configurations. Follow WebCommander’s guidelines and best practices to create a user-friendly and efficient root URL.

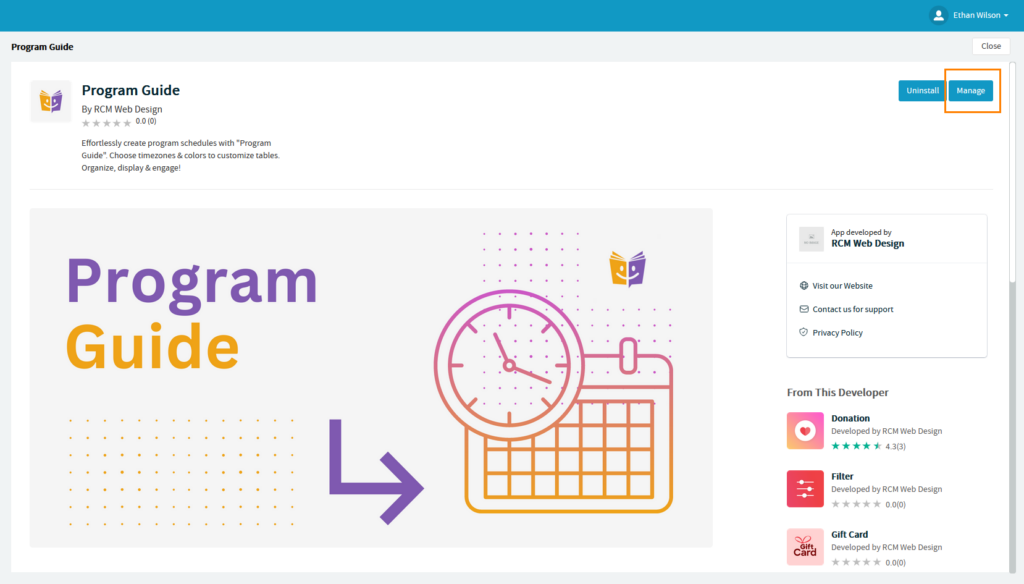
The screenshots above show the manage page of the Clubeez plugin, which is rendered through an iframe inside the WebCommander admin. You don’t need to worry about how the forms on this page communicate with WebCommander site data, as this is your plugin’s page and it can directly communicate with the plugin database. You can use the sample request below as a reference:

  • cURL
  • PHP – cURL
  • Python – http.client
  • Java – Unirest
  • C# – RestSharp
curl --location 'https://yourapp.com?uuid=F8A3-A88E-C6EF-B1CB&timestamp=1683788339&hmac=CIaGf7Ely0ykfBOi94hEPUAacyaHmjB4oZHc0JMVLMM%3D'
<?php

$curl = curl_init();

curl_setopt_array($curl, array(
  CURLOPT_URL => 'https://yourapp.com?uuid=F8A3-A88E-C6EF-B1CB&timestamp=1683788339&hmac=CIaGf7Ely0ykfBOi94hEPUAacyaHmjB4oZHc0JMVLMM=',
  CURLOPT_RETURNTRANSFER => true,
  CURLOPT_ENCODING => '',
  CURLOPT_MAXREDIRS => 10,
  CURLOPT_TIMEOUT => 0,
  CURLOPT_FOLLOWLOCATION => true,
  CURLOPT_HTTP_VERSION => CURL_HTTP_VERSION_1_1,
  CURLOPT_CUSTOMREQUEST => 'GET',
));

$response = curl_exec($curl);

curl_close($curl);
echo $response;
import http.client

conn = http.client.HTTPSConnection("yourapp.com")
payload = ''
headers = {}
conn.request("GET", "/?uuid=F8A3-A88E-C6EF-B1CB&timestamp=1683788339&hmac=CIaGf7Ely0ykfBOi94hEPUAacyaHmjB4oZHc0JMVLMM=", payload, headers)
res = conn.getresponse()
data = res.read()
print(data.decode("utf-8"))
Unirest.setTimeouts(0, 0);
HttpResponse<String> response = Unirest.get("https://yourapp.com?uuid=F8A3-A88E-C6EF-B1CB&timestamp=1683788339&hmac=CIaGf7Ely0ykfBOi94hEPUAacyaHmjB4oZHc0JMVLMM%3D")
  .asString();
var options = new RestClientOptions("")
{
  MaxTimeout = -1,
};
var client = new RestClient(options);
var request = new RestRequest("https://yourapp.com?uuid=F8A3-A88E-C6EF-B1CB&timestamp=1683788339&hmac=CIaGf7Ely0ykfBOi94hEPUAacyaHmjB4oZHc0JMVLMM=", Method.Get);
RestResponse response = await client.ExecuteAsync(request);
Console.WriteLine(response.Content);

Request Details

Request URL: https://yourapp.com/

Request Method: GET

Request Parameter

NameTypeDescription
uuidStringPlugins UUID
timestampStringThe time of the request or the current time
hmacStringThe encryption key we found from the installation process contains encrypted data to validate requests

Accessing and Modifying Data

When developing your WebCommander plugin, you’ll need to interact with WebCommander data to provide the desired functionalities. Here’s how to access and modify WebCommander data:

Using Configuration Endpoints

  • Base URL: The base URL is the client site URL where the plugin is requested for installation.
  • Authentication: To make requests to WebCommander, include the “accessToken” and “uuid” values in the request header, ensuring they are in the proper format and syntax required by WebCommander.

customer-registration-fields

To check the status of customer meta fields, you can call the following endpoint. Examples of how to use this endpoint are provided below:

  • cURL
  • PHP – cUR
  • Python – http.client
  • Java – Unirest
  • C# – RestSharp
curl --location 'http://5289d153.wc-stage.webcommander.com/external/app/access/customer-registration-fields' \
--header 'accessToken: 11b4ec017714ef095b8e115545467fcb' \
--header 'uuid: F8A3-A88E-C6EF-B1CB'
<?php

$curl = curl_init();

curl_setopt_array($curl, array(
  CURLOPT_URL => 'http://5289d153.wc-stage.webcommander.com/external/app/access/customer-registration-fields',
  CURLOPT_RETURNTRANSFER => true,
  CURLOPT_ENCODING => '',
  CURLOPT_MAXREDIRS => 10,
  CURLOPT_TIMEOUT => 0,
  CURLOPT_FOLLOWLOCATION => true,
  CURLOPT_HTTP_VERSION => CURL_HTTP_VERSION_1_1,
  CURLOPT_CUSTOMREQUEST => 'GET',
  CURLOPT_HTTPHEADER => array(
    'accessToken: 11b4ec017714ef095b8e115545467fcb',
    'uuid: F8A3-A88E-C6EF-B1CB'
  ),
));

$response = curl_exec($curl);

curl_close($curl);
echo $response;
import http.client
import mimetypes
from codecs import encode

conn = http.client.HTTPSConnection("5289d153.wc-stage.webcommander.com")
boundary = ''
payload = ''
headers = {
  'accessToken': '11b4ec017714ef095b8e115545467fcb',
  'uuid': 'F8A3-A88E-C6EF-B1CB',
  'Content-type': 'multipart/form-data; boundary={}'.format(boundary)
}
conn.request("GET", "/external/app/access/customer-registration-fields", payload, headers)
res = conn.getresponse()
data = res.read()
print(data.decode("utf-8"))
Unirest.setTimeouts(0, 0);
HttpResponse<String> response = Unirest.get("http://5289d153.wc-stage.webcommander.com/external/app/access/customer-registration-fields")
  .header("accessToken", "11b4ec017714ef095b8e115545467fcb")
  .header("uuid", "F8A3-A88E-C6EF-B1CB")
  .multiPartContent()
  .asString();
var options = new RestClientOptions("")
{
  MaxTimeout = -1,
};
var client = new RestClient(options);
var request = new RestRequest("http://5289d153.wc-stage.webcommander.com/external/app/access/customer-registration-fields", Method.Get);
request.AddHeader("accessToken", "11b4ec017714ef095b8e115545467fcb");
request.AddHeader("uuid", "F8A3-A88E-C6EF-B1CB");
RestResponse response = await client.ExecuteAsync(request);
Console.WriteLine(response.Content);

Request Details

  • Request URL: http://5289d153.wc-stage.webcommander.com/external/app/access/customer-registration-fields
  • Request Method: GET
  • Request Parameter: None

Response

{
    "first_name_order": "1",
    "first_name_key": "first_name",
    "first_name_label": "First Name",
    "first_name_active": true,
    "first_name_required": true,
    "last_name_order": "2",
    "last_name_key": "last_name",
    "last_name_label": "Last Name",
    "last_name_active": true,
    "last_name_required": false,
    "address_line_1_order": "3",
    "address_line_1_key": "address_line_1",
    "address_line_1_label": "Address Line 1",
    "address_line_1_active": true,
    "address_line_1_required": true,
    "address_line_2_order": "4",
    "address_line_2_key": "address_line_2",
    "address_line_2_label": "Address Line 2",
    "address_line_2_active": false,
    "address_line_2_required": false,
    "post_code_order": "5",
    "post_code_key": "post_code",
    "post_code_label": "Post Code",
    "post_code_active": true,
    "post_code_required": true,
    "city_order": "6",
    "city_key": "city",
    "city_label": "Suburb\u002fCity",
    "city_active": true,
    "city_required": true,
    "phone_order": "7",
    "phone_key": "phone",
    "phone_label": "Phone",
    "phone_active": true,
    "phone_required": false,
    "mobile_order": "8",
    "mobile_key": "mobile",
    "mobile_label": "Mobile",
    "mobile_active": true,
    "mobile_required": false,
    "fax_order": "9",
    "fax_key": "fax",
    "fax_label": "Fax",
    "fax_active": false,
    "fax_required": false,
    "email_order": "10",
    "email_key": "email",
    "email_label": "Email",
    "email_active": true,
    "email_required": true,
    "confirm_email_order": "11",
    "confirm_email_key": "confirm_email",
    "confirm_email_label": "Confirm Email",
    "confirm_email_active": false,
    "confirm_email_required": false,
    "password_order": "12",
    "password_key": "password",
    "password_label": "",
    "password_active": true,
    "password_required": true,
    "retype_password_order": "13",
    "retype_password_key": "retype_password",
    "retype_password_label": "",
    "retype_password_active": true,
    "retype_password_required": true,
    "country_order": "14",
    "country_key": "country",
    "country_label": "Country",
    "country_active": true,
    "country_required": true,
    "customer_type_order": "15",
    "customer_type_key": "customer_type",
    "customer_type_label": "",
    "customer_type_active": true,
    "customer_type_required": false,
    "sex_order": "16",
    "sex_key": "sex",
    "sex_label": "Gender",
    "sex_active": true,
    "sex_required": false,
    "abn_order": "17",
    "abn_key": "abn",
    "abn_label": "ABN",
    "abn_active": false,
    "abn_required": false,
    "abn_branch_order": "18",
    "abn_branch_key": "abn_branch",
    "abn_branch_label": "ABN Branch",
    "abn_branch_active": false,
    "abn_branch_required": false,
    "company_name_order": "19",
    "company_name_key": "company_name",
    "company_name_label": "Company Name",
    "company_name_active": true,
    "company_name_required": false
}

discount-profile

WebCommander allows you to create various types of discount profiles, and you can use the following request to learn more about them and their statuses. Below are some examples of how to use this request:

  • cURL
  • PHP – cURL
  • Python – http.client
  • Java – Unirest
  • C# – RestSharp
curl --location 'http://5289d153.wc-stage.webcommander.com/external/app/access/discount-profile' \
--header 'accessToken: 11b4ec017714ef095b8e115545467fcb' \
--header 'uuid: F8A3-A88E-C6EF-B1CB'
<?php

$curl = curl_init();

curl_setopt_array($curl, array(
  CURLOPT_URL => 'http://5289d153.wc-stage.webcommander.com/external/app/access/discount-profile',
  CURLOPT_RETURNTRANSFER => true,
  CURLOPT_ENCODING => '',
  CURLOPT_MAXREDIRS => 10,
  CURLOPT_TIMEOUT => 0,
  CURLOPT_FOLLOWLOCATION => true,
  CURLOPT_HTTP_VERSION => CURL_HTTP_VERSION_1_1,
  CURLOPT_CUSTOMREQUEST => 'GET',
  CURLOPT_HTTPHEADER => array(
    'accessToken: 11b4ec017714ef095b8e115545467fcb',
    'uuid: F8A3-A88E-C6EF-B1CB'
  ),
));

$response = curl_exec($curl);

curl_close($curl);
echo $response;
import http.client

conn = http.client.HTTPSConnection("5289d153.wc-stage.webcommander.com")
payload = ''
headers = {
  'accessToken': '11b4ec017714ef095b8e115545467fcb',
  'uuid': 'F8A3-A88E-C6EF-B1CB'
}
conn.request("GET", "/external/app/access/discount-profile", payload, headers)
res = conn.getresponse()
data = res.read()
print(data.decode("utf-8"))
Unirest.setTimeouts(0, 0);
HttpResponse<String> response = Unirest.get("http://5289d153.wc-stage.webcommander.com/external/app/access/discount-profile")
  .header("accessToken", "11b4ec017714ef095b8e115545467fcb")
  .header("uuid", "F8A3-A88E-C6EF-B1CB")
  .asString();
var options = new RestClientOptions("")
{
  MaxTimeout = -1,
};
var client = new RestClient(options);
var request = new RestRequest("http://5289d153.wc-stage.webcommander.com/external/app/access/discount-profile", Method.Get);
request.AddHeader("accessToken", "11b4ec017714ef095b8e115545467fcb");
request.AddHeader("uuid", "F8A3-A88E-C6EF-B1CB");
RestResponse response = await client.ExecuteAsync(request);
Console.WriteLine(response.Content);

Request Details

  • Request URL: http://5289d153.wc-stage.webcommander.com/external/app/access/discount-profile
  • Request Method: GET

Request Parameter

NameTypeRequiredDescription
nameStringNoName of the profile.
typeStringNoType of the profile.

Response

{
    "status": [
        {
            "displayTextCoupon": null,
            "isMaximumUseTotal": false,
            "usage": [
                {
                    "itemId": null,
                    "amount": 5.0,
                    "orderId": 62,
                    "appliedCouponCode": null,
                    "customerId": null,
                    "discount": 2,
                    "id": 2
                },
                {
                    "itemId": null,
                    "amount": 5.0,
                    "orderId": 65,
                    "appliedCouponCode": null,
                    "customerId": null,
                    "discount": 2,
                    "id": 5
                },
                {
                    "itemId": null,
                    "amount": 5.0,
                    "orderId": 68,
                    "appliedCouponCode": null,
                    "customerId": 50,
                    "discount": 2,
                    "id": 8
                },
                {
                    "itemId": null,
                    "amount": 5.0,
                    "orderId": 71,
                    "appliedCouponCode": null,
                    "customerId": 50,
                    "discount": 2,
                    "id": 11
                },
                {
                    "itemId": null,
                    "amount": 5.0,
                    "orderId": 74,
                    "appliedCouponCode": null,
                    "customerId": 56,
                    "discount": 2,
                    "id": 14
                }
            ],
            "displayTextPartialDiscountCondition": null,
            "isActive": true,
            "type": "customer",
            "isDisplayTextCoupon": false,
            "isSpecifyEndDate": false,
            "startTo": null,
            "detailsId": 2,
            "isCouponCodeAutoGenerate": true,
            "isExcludeProductsOnSale": false,
            "assoc": {
                "isAppliedAllCustomer": true,
                "isAppliedAllProduct": true,
                "customerGroups": [],
                "assocIds": [],
                "assocType": null,
                "id": 2,
                "categories": [],
                "customers": [],
                "isAppliedAllAssoc": false,
                "products": []
            },
            "isApplyCouponCode": false,
            "isDisplayTextPartialDiscountCondition": false,
            "id": 2,
            "isMaximumDiscountAllowed": false,
            "startFrom": null,
            "coupon": null,
            "defaultCouponCode": "DSCP-463C7D7845",
            "created": "2023-02-19T13:42:33",
            "displayTextCart": null,
            "maximumDiscountAllowedAmount": null,
            "isDisplayTextCart": false,
            "isMaximumUseCustomer": false,
            "version": null,
            "discountDetailsType": "amount",
            "isDisplayDiscountInformationProdDetail": true,
            "isCreateUniqueCouponEachCustomer": false,
            "maximumUseCount": null,
            "name": "Test",
            "isDiscountUsedWithOtherDiscount": false,
            "maximumUseCustomerCount": null,
            "updated": "2023-02-19T13:42:33",
            "excludeProducts": []
        }
    ]
}

email-enable-disable

You can enable or disable specific emails on a WebCommander site using the following request. Below are some examples of how to use this request:

  • cURL
  • PHP – cURL
  • Python – http.client
  • Java – Unirest
  • C# – RestSharp
curl --location 'http://5289d153.wc-stage.webcommander.com/external/app/access/email-enable-disable' \
--header 'accessToken: 11b4ec017714ef095b8e115545467fcb' \
--header 'uuid: F8A3-A88E-C6EF-B1CB' \
--form 'emailType ="customer-registration"' \
--form 'active="false"'
<?php

$curl = curl_init();

curl_setopt_array($curl, array(
  CURLOPT_URL => 'http://5289d153.wc-stage.webcommander.com/external/app/access/email-enable-disable',
  CURLOPT_RETURNTRANSFER => true,
  CURLOPT_ENCODING => '',
  CURLOPT_MAXREDIRS => 10,
  CURLOPT_TIMEOUT => 0,
  CURLOPT_FOLLOWLOCATION => true,
  CURLOPT_HTTP_VERSION => CURL_HTTP_VERSION_1_1,
  CURLOPT_CUSTOMREQUEST => 'POST',
  CURLOPT_POSTFIELDS => array(,),
  CURLOPT_HTTPHEADER => array(
    'accessToken: 11b4ec017714ef095b8e115545467fcb',
    'uuid: F8A3-A88E-C6EF-B1CB'
  ),
));

$response = curl_exec($curl);

curl_close($curl);
echo $response;
import http.client
import mimetypes
from codecs import encode

conn = http.client.HTTPSConnection("5289d153.wc-stage.webcommander.com")
dataList = []
boundary = 'wL36Yn8afVp8Ag7AmP8qZ0SA4n1v9T'
dataList.append(encode('--' + boundary))
dataList.append(encode('Content-Disposition: form-data; name=emailType;'))

dataList.append(encode('Content-Type: {}'.format('text/plain')))
dataList.append(encode(''))

dataList.append(encode("customer-registration"))
dataList.append(encode('--' + boundary))
dataList.append(encode('Content-Disposition: form-data; name=active;'))

dataList.append(encode('Content-Type: {}'.format('text/plain')))
dataList.append(encode(''))

dataList.append(encode("false"))
dataList.append(encode('--'+boundary+'--'))
dataList.append(encode(''))
body = b'\r\n'.join(dataList)
payload = body
headers = {
  'accessToken': '11b4ec017714ef095b8e115545467fcb',
  'uuid': 'F8A3-A88E-C6EF-B1CB',
  'Content-type': 'multipart/form-data; boundary={}'.format(boundary)
}
conn.request("POST", "/external/app/access/email-enable-disable", payload, headers)
res = conn.getresponse()
data = res.read()
print(data.decode("utf-8"))
Unirest.setTimeouts(0, 0);
HttpResponse<String> response = Unirest.post("http://5289d153.wc-stage.webcommander.com/external/app/access/email-enable-disable")
  .header("accessToken", "11b4ec017714ef095b8e115545467fcb")
  .header("uuid", "F8A3-A88E-C6EF-B1CB")
  .multiPartContent()
  .field("emailType ", "customer-registration")
  .field("active", "false")
  .asString();
var options = new RestClientOptions("")
{
  MaxTimeout = -1,
};
var client = new RestClient(options);
var request = new RestRequest("http://5289d153.wc-stage.webcommander.com/external/app/access/email-enable-disable", Method.Post);
request.AddHeader("accessToken", "11b4ec017714ef095b8e115545467fcb");
request.AddHeader("uuid", "F8A3-A88E-C6EF-B1CB");
request.AlwaysMultipartFormData = true;
request.AddParameter("emailType ", "customer-registration");
request.AddParameter("active", "false");
RestResponse response = await client.ExecuteAsync(request);
Console.WriteLine(response.Content);

Request Details

  • Request URL: http://5289d153.wc-stage.webcommander.com/external/app/access/email-enable-disable
  • Request Method: POST

Request Parameter

NameTypeRequiredDescription
emailTypeStringYesThe type of email you want to enable/disable for WebCommander can be specified using the following accepted values:

• payment-success
• payment-pending
• payment-refund
• partial-payment
• tell-friend
• send-invoice
• create-order
• partial-shipment
• shipment-complete
• operator-reset-password
• service-status
• order-sync-missing-notification
• customer-reset-password
• customer-welcome-email
• create-customer
• customer-registration
• create-operator
• customer-restricted-registration-notification
• customer-restricted-registration-approval
• customer.registration.verification
• store-credit-request
• newsletter-subscription-notification
• customer-order-comment-notification
• admin-order-comment-notification
• low-stock-notification
• out-of-stock-notification
• downloadable-product
• incomplete-payment-notification
• low-stock-report
activeBooleanyesTo enable or disable, input either “true” or “false”.

Response

{"status":false}

email-status

You can determine the status of a specific email type (whether it is enabled or disabled) by making the following request:

  • cURL
  • PHP – cURL
  • Python – http.client
  • Java – Unirest
  • C# – RestSharp
curl --location 'http://5289d153.wc-stage.webcommander.com/external/app/access/email-status?emailType=customer-registration' \
--header 'accessToken: 11b4ec017714ef095b8e115545467fcb' \
--header 'uuid: F8A3-A88E-C6EF-B1CB'
<?php

$curl = curl_init();

curl_setopt_array($curl, array(
  CURLOPT_URL => 'http://5289d153.wc-stage.webcommander.com/external/app/access/email-status?emailType=customer-registration',
  CURLOPT_RETURNTRANSFER => true,
  CURLOPT_ENCODING => '',
  CURLOPT_MAXREDIRS => 10,
  CURLOPT_TIMEOUT => 0,
  CURLOPT_FOLLOWLOCATION => true,
  CURLOPT_HTTP_VERSION => CURL_HTTP_VERSION_1_1,
  CURLOPT_CUSTOMREQUEST => 'GET',
  CURLOPT_HTTPHEADER => array(
    'accessToken: 11b4ec017714ef095b8e115545467fcb',
    'uuid: F8A3-A88E-C6EF-B1CB'
  ),
));

$response = curl_exec($curl);

curl_close($curl);
echo $response;
import http.client
import mimetypes
from codecs import encode

conn = http.client.HTTPSConnection("5289d153.wc-stage.webcommander.com")
boundary = ''
payload = ''
headers = {
  'accessToken': '11b4ec017714ef095b8e115545467fcb',
  'uuid': 'F8A3-A88E-C6EF-B1CB',
  'Content-type': 'multipart/form-data; boundary={}'.format(boundary)
}
conn.request("GET", "/external/app/access/email-status?emailType=customer-registration", payload, headers)
res = conn.getresponse()
data = res.read()
print(data.decode("utf-8"))
Unirest.setTimeouts(0, 0);
HttpResponse<String> response = Unirest.get("http://5289d153.wc-stage.webcommander.com/external/app/access/email-status?emailType=customer-registration")
  .header("accessToken", "11b4ec017714ef095b8e115545467fcb")
  .header("uuid", "F8A3-A88E-C6EF-B1CB")
  .multiPartContent()
  .asString();
var options = new RestClientOptions("")
{
  MaxTimeout = -1,
};
var client = new RestClient(options);
var request = new RestRequest("http://5289d153.wc-stage.webcommander.com/external/app/access/email-status?emailType=customer-registration", Method.Get);
request.AddHeader("accessToken", "11b4ec017714ef095b8e115545467fcb");
request.AddHeader("uuid", "F8A3-A88E-C6EF-B1CB");
request.AlwaysMultipartFormData = true;
RestResponse response = await client.ExecuteAsync(request);
Console.WriteLine(response.Content);

Request Details

  • Request URL: http://5289d153.wc-stage.webcommander.com/external/app/access/email-status
  • Request Method: GET

Request Parameter

NameTypeRequiredDescription
emailTypeStringYesThe email status type you want to check. Accepted values are given below:

• payment-success
• payment-pending
• payment-refund
• partial-payment
• tell-friend
• send-invoice
• create-order
• partial-shipment
• shipment-complete
• operator-reset-password
• service-status
• order-sync-missing-notification
• customer-reset-password
• customer-welcome-email
• create-customer
• customer-registration
• create-operator
• customer-restricted-registration-notification
• customer-restricted-registration-approval
• customer.registration.verification
• store-credit-request
• newsletter-subscription-notification
• customer-order-comment-notification
• admin-order-comment-notification
• low-stock-notification
• out-of-stock-notification
• downloadable-product
• incomplete-payment-notification
• low-stock-report

Response

{"status":false}

Manage Page

Every WebCommander plugin should have its own configuration or management page section where plugin operations are handled. To access or modify data from different modules, you need to follow appropriate protocols and guidelines such as authentication, encryption, and secure storage practices. By implementing your plugin’s configuration page section properly, you can ensure that your plugin is both effective and compliant with WebCommander’s policies. Follow instructions carefully to ensure smooth and effective plugin operation within the WebCommander ecosystem.

Required Endpoints

To successfully develop a plugin for WebCommander, it’s essential to understand the required endpoints for communication with the platform. These endpoints facilitate the installation and uninstallation of your plugin. Here, we outline the necessary endpoints and provide examples in various programming languages for your reference.

Install Endpoint

When a client initiates the installation process for your WebCommander plugin, the platform will first look for your /install endpoint. You must develop this endpoint to handle specific payloads provided by WebCommander. Based on the response from your /install endpoint, WebCommander will determine which modules your plugin needs access to and complete the installation process within the client’s site.

Example Implementations

  • cURL
  • PHP – cURL
  • Python – http.client
  • Java – Unirest
  • C# – Restsharp
curl --location --request GET 'https://yourapp.com/install?uuid=F8A3-A88E-C6EF-B1CB' \
--form 'token="517e58080ddddf80d2f23b1783a2a457"' \
--form 'accessToken="11b4ec017714ef095b8e115545467fcb"' \
--form 'clientSecret="6b73c5a273cf49300dbec9b8abf83a06"' \
--form 'clientId="48eaecb5dc079f039cb09b50ab9cae54"' \
--form 'refreshToken="1db5045139d1e701b72f8046d2d17135"' \
--form 'encryptionKey="CIaGf7Ely0ykfBOi94hEPUAacyaHmjB4oZHc0JMVLMM="' \
--form 'apiUrl="http://5289d153.wc-stage.webcommander.com/"' \
--form 'adminPanel="https://stage-my.webcommander.com/"'
<?php

$curl = curl_init();

curl_setopt_array($curl, array(
  CURLOPT_URL => 'https://yourapp.com/install?uuid=F8A3-A88E-C6EF-B1CB',
  CURLOPT_RETURNTRANSFER => true,
  CURLOPT_ENCODING => '',
  CURLOPT_MAXREDIRS => 10,
  CURLOPT_TIMEOUT => 0,
  CURLOPT_FOLLOWLOCATION => true,
  CURLOPT_HTTP_VERSION => CURL_HTTP_VERSION_1_1,
  CURLOPT_CUSTOMREQUEST => 'GET',
  CURLOPT_POSTFIELDS => array(,,,,,,,),
));

$response = curl_exec($curl);

curl_close($curl);
echo $response;
import http.client
import mimetypes
from codecs import encode

conn = http.client.HTTPSConnection("yourapp.com")
dataList = []
boundary = 'wL36Yn8afVp8Ag7AmP8qZ0SA4n1v9T'
dataList.append(encode('--' + boundary))
dataList.append(encode('Content-Disposition: form-data; name=token;'))

dataList.append(encode('Content-Type: {}'.format('text/plain')))
dataList.append(encode(''))

dataList.append(encode("517e58080ddddf80d2f23b1783a2a457"))
dataList.append(encode('--' + boundary))
dataList.append(encode('Content-Disposition: form-data; name=accessToken;'))

dataList.append(encode('Content-Type: {}'.format('text/plain')))
dataList.append(encode(''))

dataList.append(encode("11b4ec017714ef095b8e115545467fcb"))
dataList.append(encode('--' + boundary))
dataList.append(encode('Content-Disposition: form-data; name=clientSecret;'))

dataList.append(encode('Content-Type: {}'.format('text/plain')))
dataList.append(encode(''))

dataList.append(encode("6b73c5a273cf49300dbec9b8abf83a06"))
dataList.append(encode('--' + boundary))
dataList.append(encode('Content-Disposition: form-data; name=clientId;'))

dataList.append(encode('Content-Type: {}'.format('text/plain')))
dataList.append(encode(''))

dataList.append(encode("48eaecb5dc079f039cb09b50ab9cae54"))
dataList.append(encode('--' + boundary))
dataList.append(encode('Content-Disposition: form-data; name=refreshToken;'))

dataList.append(encode('Content-Type: {}'.format('text/plain')))
dataList.append(encode(''))

dataList.append(encode("1db5045139d1e701b72f8046d2d17135"))
dataList.append(encode('--' + boundary))
dataList.append(encode('Content-Disposition: form-data; name=encryptionKey;'))

dataList.append(encode('Content-Type: {}'.format('text/plain')))
dataList.append(encode(''))

dataList.append(encode("CIaGf7Ely0ykfBOi94hEPUAacyaHmjB4oZHc0JMVLMM="))
dataList.append(encode('--' + boundary))
dataList.append(encode('Content-Disposition: form-data; name=apiUrl;'))

dataList.append(encode('Content-Type: {}'.format('text/plain')))
dataList.append(encode(''))

dataList.append(encode("http://5289d153.wc-stage.webcommander.com/"))
dataList.append(encode('--' + boundary))
dataList.append(encode('Content-Disposition: form-data; name=adminPanel;'))

dataList.append(encode('Content-Type: {}'.format('text/plain')))
dataList.append(encode(''))

dataList.append(encode("https://stage-my.webcommander.com/"))
dataList.append(encode('--'+boundary+'--'))
dataList.append(encode(''))
body = b'\r\n'.join(dataList)
payload = body
headers = {
   'Content-type': 'multipart/form-data; boundary={}'.format(boundary) 
}
conn.request("GET", "/install?uuid=F8A3-A88E-C6EF-B1CB", payload, headers)
res = conn.getresponse()
data = res.read()
print(data.decode("utf-8"))
Unirest.setTimeouts(0, 0);
HttpResponse<String> response = Unirest.get("https://yourapp.com/install?uuid=F8A3-A88E-C6EF-B1CB")
  .multiPartContent()
  .field("token", "517e58080ddddf80d2f23b1783a2a457")
  .field("accessToken", "11b4ec017714ef095b8e115545467fcb")
  .field("clientSecret", "6b73c5a273cf49300dbec9b8abf83a06")
  .field("clientId", "48eaecb5dc079f039cb09b50ab9cae54")
  .field("refreshToken", "1db5045139d1e701b72f8046d2d17135")
  .field("encryptionKey", "CIaGf7Ely0ykfBOi94hEPUAacyaHmjB4oZHc0JMVLMM=")
  .field("apiUrl", "http://5289d153.wc-stage.webcommander.com/")
  .field("adminPanel", "https://stage-my.webcommander.com/")
  .asString();
var options = new RestClientOptions("")
{
  MaxTimeout = -1,
};
var client = new RestClient(options);
var request = new RestRequest("https://yourapp.com/install?uuid=F8A3-A88E-C6EF-B1CB", Method.Get);
request.AlwaysMultipartFormData = true;
request.AddParameter("token", "517e58080ddddf80d2f23b1783a2a457");
request.AddParameter("accessToken", "11b4ec017714ef095b8e115545467fcb");
request.AddParameter("clientSecret", "6b73c5a273cf49300dbec9b8abf83a06");
request.AddParameter("clientId", "48eaecb5dc079f039cb09b50ab9cae54");
request.AddParameter("refreshToken", "1db5045139d1e701b72f8046d2d17135");
request.AddParameter("encryptionKey", "CIaGf7Ely0ykfBOi94hEPUAacyaHmjB4oZHc0JMVLMM=");
request.AddParameter("apiUrl", "http://5289d153.wc-stage.webcommander.com/");
request.AddParameter("adminPanel", "https://stage-my.webcommander.com/");
RestResponse response = await client.ExecuteAsync(request);
Console.WriteLine(response.Content);

Request Details

Request URL: https://yourapp.com/install?uuid=F8A3-A88E-C6EF-B1CB

Request Method: GET

Request Parameter
NameType RequiredRequired
tokenStringYesToken is used as a verifier to communicate with WebCommander APIs.
adminPanelStringYesWebCommander dashboard URL of the site where the plugin is requested to install.
accessTokenStringYesAccess token is used as a verifier to communicate with WebCommander APIs.
clientIdStringYesA unique idetifier for users.
clientSecretStringYesClient secret protects system resources by granting tokens.
refreshTokenStringYesA unique key for a client to request new access token.
encryptionKeyStringNoA validation algorithm to encode a secret key.
apiUrlStringYesThe base url of WebCommander site where the plugin is requested to install.
Response
{
    "webhooks": [
        {
            "sourceUrl": "https://example.com/api/v1/webhooks/get",
            "eventName": "DummyEvent1",
            "renderScope": "",
            "accessType": "webhook"
        },
        {
            "sourceUrl": "https://example.com/api/v1/webhooks/submit",
            "eventName": "DummyEvent2",
            "renderScope": "",
            "accessType": "webhook"
        }
    ],
    "scriptTags": [
        {
            "sourceUrl": "https://yourapp.com/assets/js/script-tag.js",
            "eventName": "DummyName",
            "renderScope": "All",
            "accessType": "scriptTag"
        }
    ],
    "widgets": [
        {
            "widgetName": "WidgetABC",
            "widgetLabel": "DummyWidget",
            "widgetTitle": "DummyWidget",
            "widgetLogo": "https://example.com/assets/images/widget-icon.svg",
            "sourceUrl": "https://example.com/DummyWidget/Index",
            "configurationUrl": "https://example.com/DummyWidgetSettings/Index"
        }
    ],
    "customerProfileTabs": [
        {
            "customerProfileTabIdentifier": "ProfileTab1",
            "customerProfileTabDisplayName": "Tab1",
            "customerProfileTabSourceUrl": "https://example.com/Tab1"
        },
        {
            "customerProfileTabIdentifier": "ProfileTab2",
            "customerProfileTabDisplayName": "Tab2",
            "customerProfileTabSourceUrl": "https://example.com/Tab2"
        },
        {
            "customerProfileTabIdentifier": "ProfileTab3",
            "customerProfileTabDisplayName": "Tab3",
            "customerProfileTabSourceUrl": "https://example.com/Tab3"
        }
    ],
    "apiAccessScopes": [
        "customer_create"
    ]
}

Uninstall Endpoint

When a client initiates the uninstallation process for your WebCommander plugin, WebCommander will call your /uninstall endpoint. This endpoint must be developed to handle specific payloads provided by WebCommander. The payload contains data related to the client’s site, which your plugin will use to perform necessary cleanup operations.

Example Implementations

  • cURL
  • PHP – cURL
  • Python – http.client
  • Java – Unirest
  • C# – RestSharp
curl --location 'https://yourapp.com/uninstall?uuid=F8A3-A88E-C6EF-B1CB'
<?php

$curl = curl_init();

curl_setopt_array($curl, array(
  CURLOPT_URL => 'https://yourapp.com/uninstall?uuid=F8A3-A88E-C6EF-B1CB',
  CURLOPT_RETURNTRANSFER => true,
  CURLOPT_ENCODING => '',
  CURLOPT_MAXREDIRS => 10,
  CURLOPT_TIMEOUT => 0,
  CURLOPT_FOLLOWLOCATION => true,
  CURLOPT_HTTP_VERSION => CURL_HTTP_VERSION_1_1,
  CURLOPT_CUSTOMREQUEST => 'GET',
));

$response = curl_exec($curl);

curl_close($curl);
echo $response;
import http.client

conn = http.client.HTTPSConnection("yourapp.com")
payload = ''
headers = {}
conn.request("GET", "/uninstall?uuid=F8A3-A88E-C6EF-B1CB", payload, headers)
res = conn.getresponse()
data = res.read()
print(data.decode("utf-8"))
Unirest.setTimeouts(0, 0);
HttpResponse<String> response = Unirest.get("https://yourapp.com/uninstall?uuid=F8A3-A88E-C6EF-B1CB")
  .asString();
var options = new RestClientOptions("")
{
  MaxTimeout = -1,
};
var client = new RestClient(options);
var request = new RestRequest("https://yourapp.com/uninstall?uuid=F8A3-A88E-C6EF-B1CB", Method.Get);
RestResponse response = await client.ExecuteAsync(request);
Console.WriteLine(response.Content);

Request Details

Request URL: https://yourapp.com/uninstall?uuid=F8A3-A88E-C6EF-B1CB

Request Method: GET

Request Parameter
NameTypeRequiredDescription
uuidStringrequiredThe uuid of the site where the plugin is requested to uninstall.
Response
{
    "status" : 200, // or error code
    "Message" : 'Success' // or error message
}

Project Setup

In the initial stages of plugin development for WebCommander, you can create a configuration page, which serves as the central hub for your plugin’s setup. This page will also determine where users land when they access your plugin through the marketplace. Additionally, you must set up the install and uninstall endpoints for your plugin. After installation, your plugin can return various types of configurations, such as webhooks, scriptTags, widgets, customerProfileTabs, and apiAccessScopes. It’s important to clearly state what you need from these configurations during this process.

Configuration Page

Your plugin’s configuration page, often referred to as the landing page, is where users can adjust settings, connect to external services, and customise how your plugin behaves within WebCommander.

Install and Uninstall Endpoints

During the installation process of your plugin, you need to implement both the install and uninstall endpoints. These endpoints are crucial for setting up and removing your plugin’s functionality within WebCommander.

Install Endpoint

The install endpoint is responsible for returning the configurations that your plugin requires. It can return four types of configurations: webhooks, scriptTags, widgets, customerProfileTabs, and apiAccessScopes.

Example:

{
    "webhooks": [
        {
            "sourceUrl": "https://yourapp.com/api/v1/cart/added-to-cart",
            "eventName": "added-to-cart",
            "renderScope": "",
            "accessType": "webhook"
        }
    ],
    "scriptTag": [
        {
            "sourceUrl": "https://yourapp.com/assets/js/script-tag.js",
            "renderScope": "All",
            "accessType": "scriptTag"
        }
    ],
    "customerProfileTabs": [
        {
            "customerProfileTabIdentifier": "myPluginTab",
            "customerProfileTabDisplayName": "My Plugin",
            "customerProfileTabSourceUrl": "https://yourapp.com/plugin/my-plugin"
        }
    ]
}

Uninstall Endpoint

The uninstall endpoint handles the removal of your plugin’s functionality from WebCommander. It should perform any necessary cleanup or de-registration of resources associated with your plugin.

Plugin Integration Options

Webhooks

Webhooks allow your plugin to subscribe to and receive notifications about specific events within WebCommander. To request webhooks, you need to specify the name, scope, access type, event name, and source URL.

Example

{
    "sourceUrl": "https://yourapp.com/api/v1/cart/added-to-cart",
    "eventName": "added-to-cart",
    "renderScope": "",
    "accessType": "webhook"
}

ScriptTags

ScriptTags enable you to inject JavaScript code into the WebCommander interface. You can use them to manipulate the DOM or customise the user interface. When requesting script tags, define the source URL and render scope.

Example

{
    "sourceUrl": "https://yourapp.com/assets/js/script-tag.js",
    "eventName": "",
    "renderScope": "All",
    "accessType": "scriptTag"
}

Widgets

Widgets provide additional UI components that can be integrated into WebCommander. Specify the widget’s details when requesting widgets.

Example

{
    "widgetName": "WidgetABC",
    "widgetLabel": "DummyWidget",
    "widgetTitle": "DummyWidget",
    "widgetLogo": "https://example.com/assets/images/widget-icon.svg",
    "sourceUrl": "https://example.com/DummyWidget/Index",
    "configurationUrl": "https://example.com/DummyWidgetSettings/Index"
}

Customer Profile Tabs

Customer Profile Tabs let you add custom tabs to the customer profile section in WebCommander. Define the tab’s identifier, display name, and source URL.

Example

{
    "scopes": ["read_orders", "write_products"]
}

ApiAccessScopes

ApiAccessScopes determines the level of access and permissions your plugin requires when interacting with WebCommander’s APIs. Specify the needed scopes for your plugin’s functionality.

Example

{
    "scopes": ["read_orders", "write_products"]
}

Creating a plugin configuration page and implementing install and uninstall endpoints are essential steps in WebCommander plugin development. By specifying the required configurations, such as webhooks, scriptTags, widgets, customerProfileTabs, and apiAccessScopes, you can tailor your plugin to meet specific needs and interact seamlessly with WebCommander.

Managing Plugins in Marketplace

Partners can easily manage their plugins in the WebCommander marketplace through the Partner Portal. This central hub allows partners to make changes to their offerings and expand their presence in the marketplace. Here’s how you can add or remove plugins:

Adding Plugins to The Marketplace

As a partner/developer, you can expand your offerings and provide more value to your customers by adding plugins to the system. Here’s how you can easily create and submit a new plugin:

  • Click on the “Add Plugin” button on the dashboard.
  • Enter the Plugin Name, Category, and Short Description. The category helps users find your plugin easily

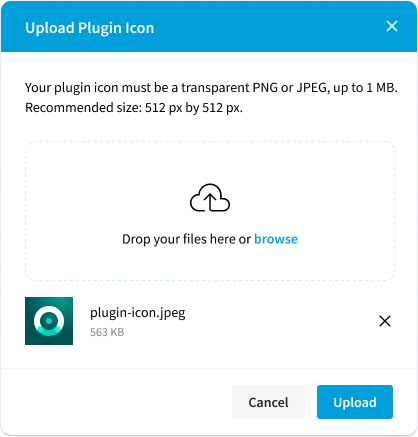
Provide detailed information about the plugin. You can upload a logo, preview images and videos, a plugin description, website and support document URLs, Privacy Policy URLs, and your preferred pricing model for the plugin. This information helps users understand what your plugin does and how it can benefit them.

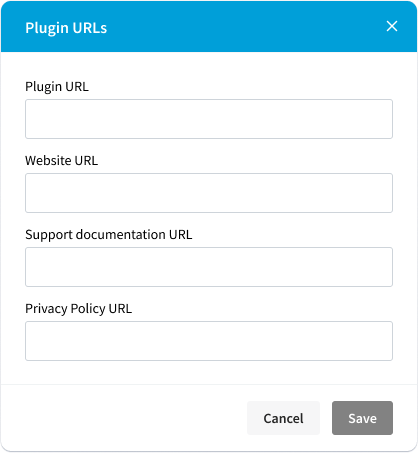
To ensure that your plugin is available through the WebCommander marketplace, it is essential to provide the base URL of your project in the plugin URLs section. Please refer to our Required Endpoints section for more details on this critical step.

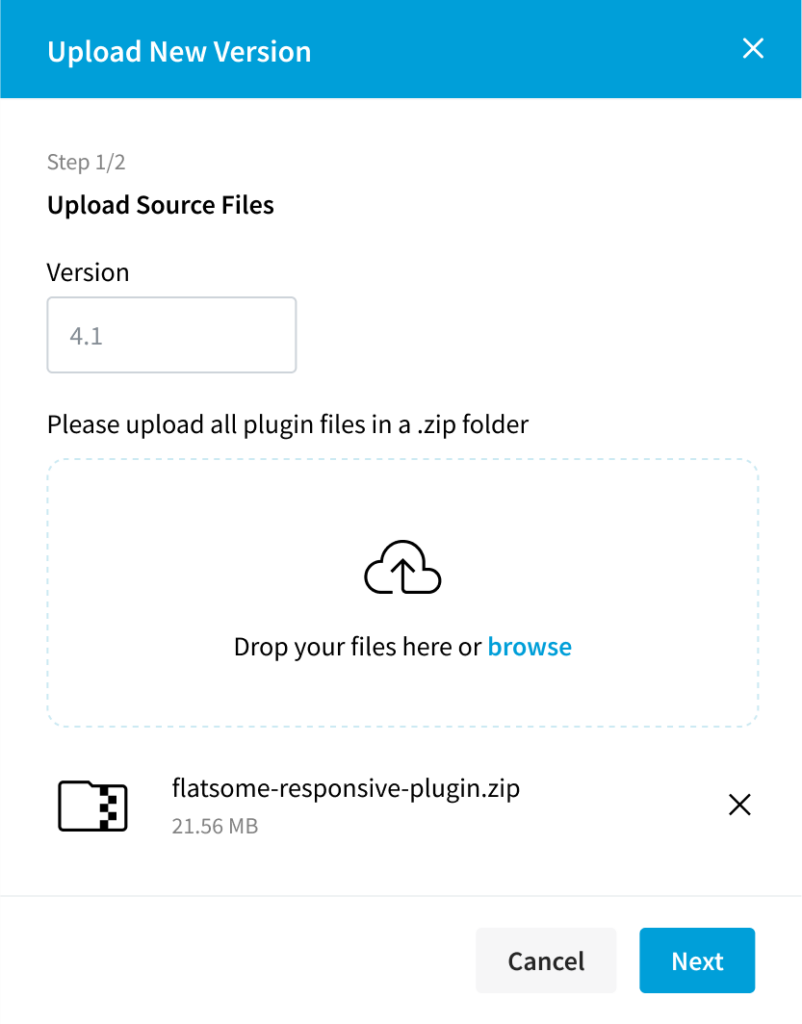
  • Upload a plugin source file in ZIP format with the Version number. Make sure the plugin source file includes everything necessary for the plugin to function properly.
  • After completing each step, the index will indicate that the step has been completed with a green tick mark.
  • When you have completed all the steps, you can submit the plugin for review.

Your plugin will have the following status:

  • Draft: if you have not yet submitted it.
  • In Review: if the support team is reviewing it.
  • Active: if the plugin has been approved. The approved plugin will automatically be added to the marketplace.
  • Rejected: if the plugin has been rejected

  • If your plugin doesn’t get approved, don’t worry. We’ll provide you with valuable feedback that will highlight the areas that need improvement. With this feedback, you can make the necessary changes and resubmit your plugin for reconsideration. It’s important to implement these changes to ensure that your plugin meets the necessary standards for approval.

Removing Plugins From the Marketplace

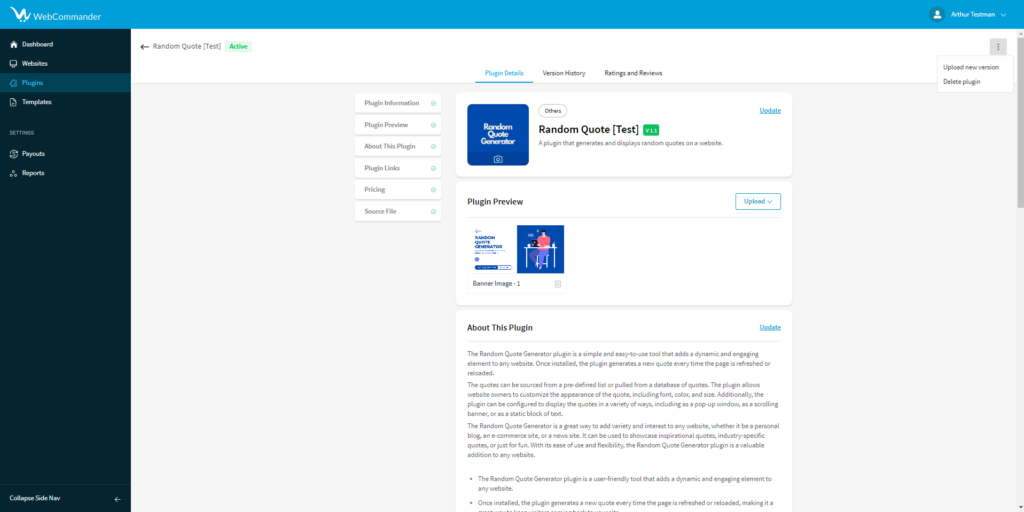
  • From the plugin list, click on the plugin you want to remove. It will take you to the plugin details page.
  • In the plugin details page, click on the kebab menu on the right side of the screen.
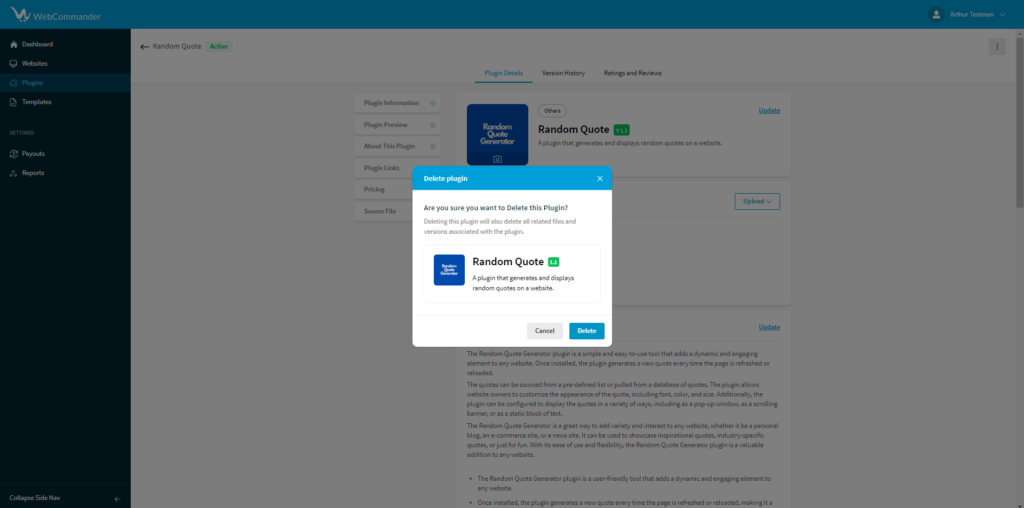
  • You will find the “Delete Plugin” option. If you click the “Delete Plugin” button, it will ask for confirmation if you want to delete it or not.
  • If you confirm the deletion, the plugin will be removed from the marketplace.

Please note that the WebCommander team reserves the right to remove your plugin from the marketplace if it violates our guidelines or poses a risk to the platform or its users. We are committed to maintaining a secure and reliable environment for our partners and customers. Therefore, we may take action to ensure the integrity and quality of the plugins available in the marketplace.

We hope this guide has helped add and remove plugins to/from the system as a partner. If you have further questions or concerns, please contact our support team for assistance.

Building a Website

As a partner, your responsibility includes the creation and customisation of websites, along with the testing of your plugins. You have the flexibility to design both e-commerce and web content platforms using the ‘create website’ feature available through the partner portal.

Creating a Website

To create a website, follow the steps given below:

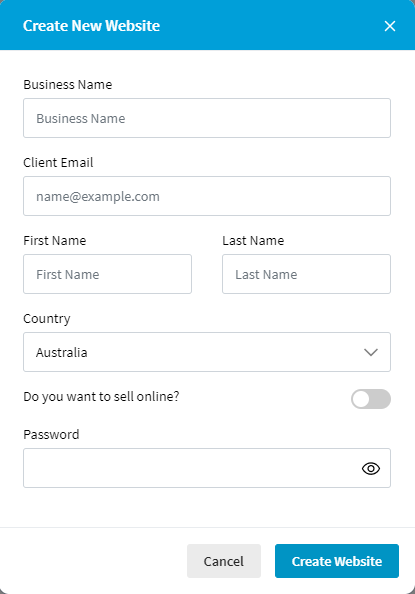
  • Click on the “Create Website” Button.
  • Enter the Business Name, Client Email, First and Last Name, and Country Name of the client.
  • Answer the question “Do you want to sell online?” with Yes or No. If the answer is Yes, an e-commerce site will be deployed. If the answer is No, a web content site will be deployed.
  • If the website is deployed successfully, it will carry an “Active” status.

Managing a Website

Once a website is created, you can manage it by following the steps given below:

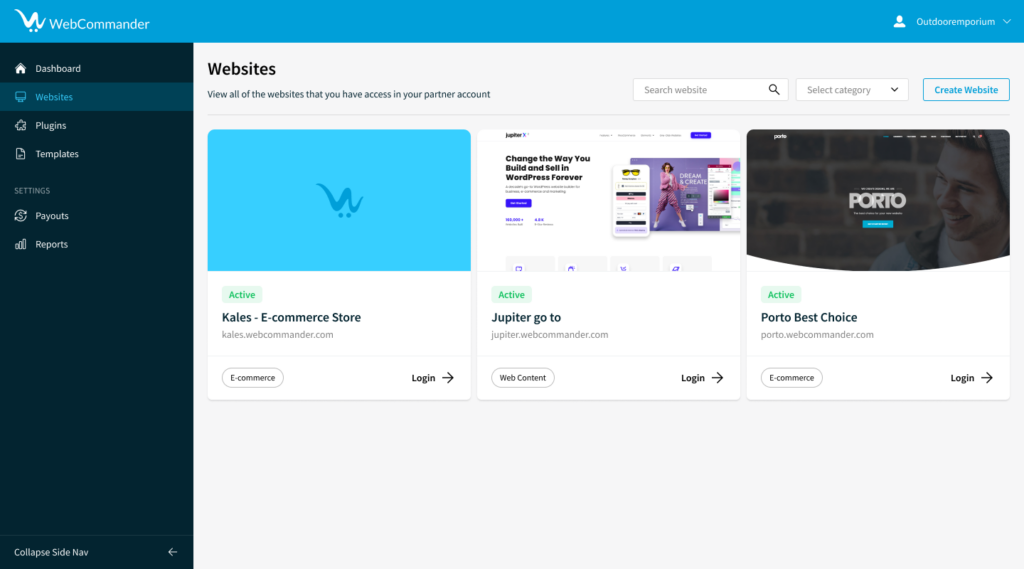
  • Click on “Website” from the sidebar menu.
  • You will see a list of websites that you have created.
  • You can identify each website as Ecommerce or WebContent.
  • You can log in to each website to manage it.
  • Access the details view page of a website by clicking on the corresponding tile or card.
  • You can update the website’s information and upload images from the details view page.
  • To delete a website, click on the delete button, and confirm it with the popup message.

Client Login Details

You can provide login details to your client by following the steps given below:

  • Access the details view page of a website by clicking on the corresponding tile or card.
  • To send login information to your client, click on the kebab menu or three-dot menu, and choose the “Send login info to client” option.
  • A popup titled “Invite Client to Login” will appear, displaying the email subject and message that you can use to invite your client to log in.
  • To share the login information with your client, click on the “Send invitation” button.

By following the steps mentioned above, you can create websites for your clients, manage them, and provide login details to your clients. In case you face any glitches or errors while creating or managing a website, you will see an error message screen. For any further assistance or queries, please contact our support team.

Join Our Partner Program

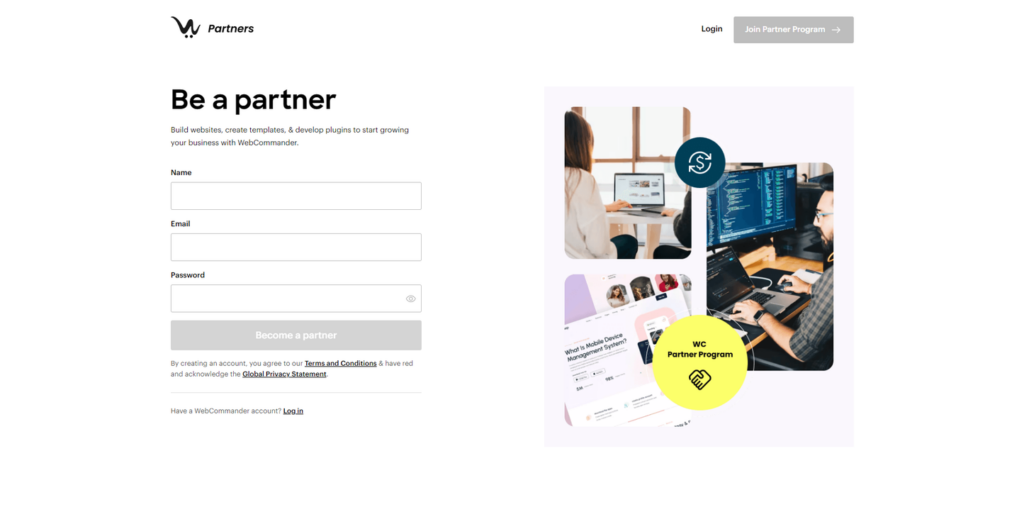
Joining the WebCommander Partner Program is a straightforward process. As a new partner, you can start the signup/registration process by providing your name, email address, and password. Once you have completed the signup process, you will be redirected to the Setup Wizard, where you can provide more information about your business and products.

Signup Process

  • To create an account, go to the signup page: Partner Program
  • In the signup page fill in your name, email, and password in the spaces provided.
  • Your name should be your full name.
  • Enter your email address in the next space. Make sure it’s a valid email address that you can access, as you’ll need it to log in later.
  • Choose a password that’s both easy for you to remember and secure. It should be at least eight characters long and include a mix of upper and lower case letters and at least one number or symbol.
  • Once you’ve filled in all the fields, click the “Sign up” button.
  • The system will check your information to ensure everything is correct and secure. If there are any issues, you’ll be prompted to fix them.
  • If everything is in order, you will be directed to the “Setup Wizard” to proceed further.

Setup Wizard

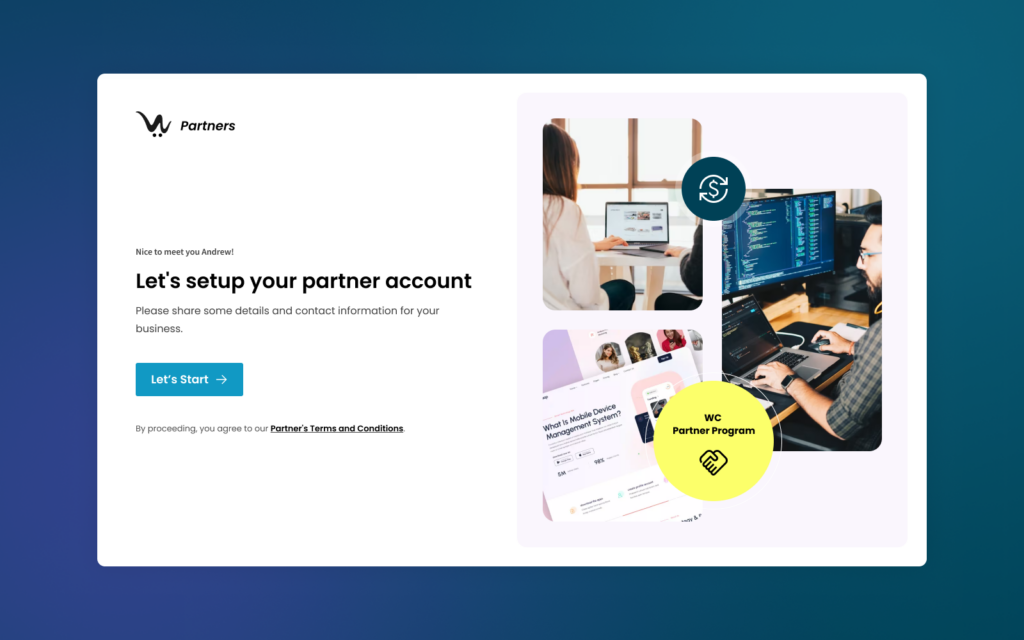
As a new partner in our program, it is necessary for you to set up your account by completing a setup wizard. This wizard has been designed to assist you in the process of account setup and ensure a seamless and efficient onboarding experience for you.

  • From the setup wizard, which will begin with a greetings page.
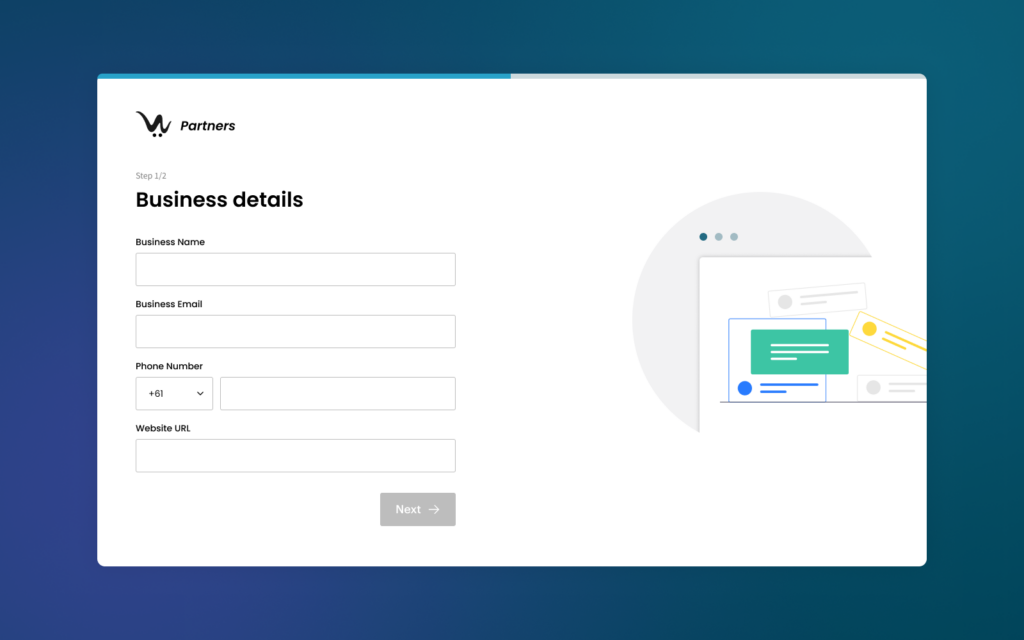
  • On the business details page of the wizard, you will be asked to enter information about your business, including your business name, email address, phone number, and Website URL.
  • After you’ve filled in your business details, click the “Next” button to proceed to the address information page.
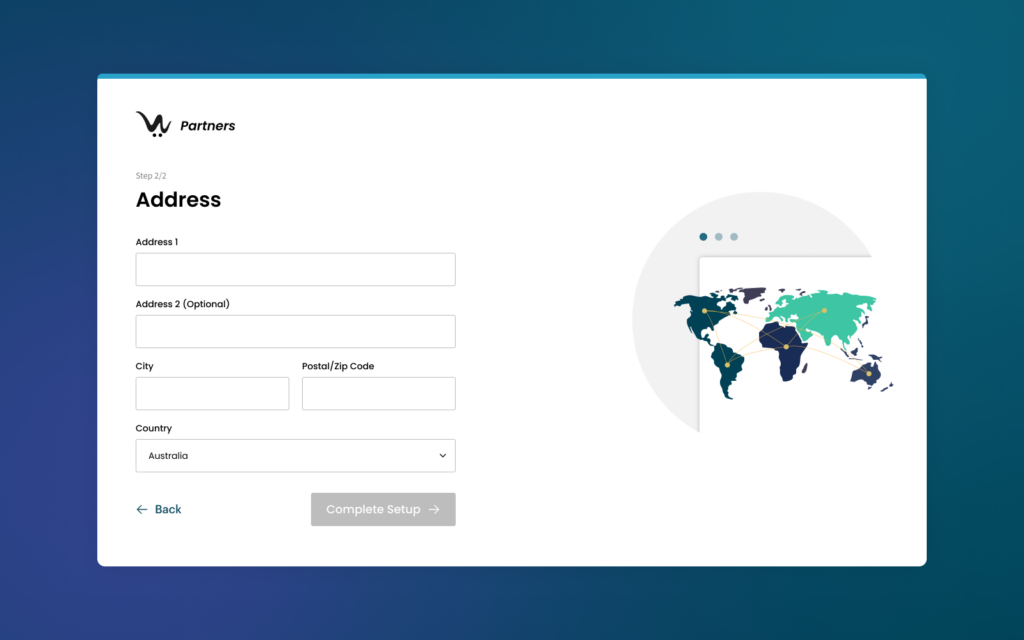
  • On the address page, you will be prompted to enter your business address. This may include your street address, city, state/province, postal code, and country.
  • Once you’ve filled in your address information, click the “Complete Setup” button.
  • Congratulations! You’ve now signed up and completed the setup wizard for your account. You should now be able to access your account dashboard and begin using the platform.

To proceed with creating a template, the next step is to create a website. By following the instructions in Building a Website, you will be guided through the process of creating a website, which is a crucial step in the template creation process.