Demo Template
Hello World Template Tutorial: Step-by-Step Guide to Creating Your First Template
To create a Hello World template using WebCommander, please adhere to the following step-by-step instructions. Pay attention to the subsequent actions:
Step 1
- Follow the steps mentioned on the Template Cleanup page, before proceeding with the Hello World template.
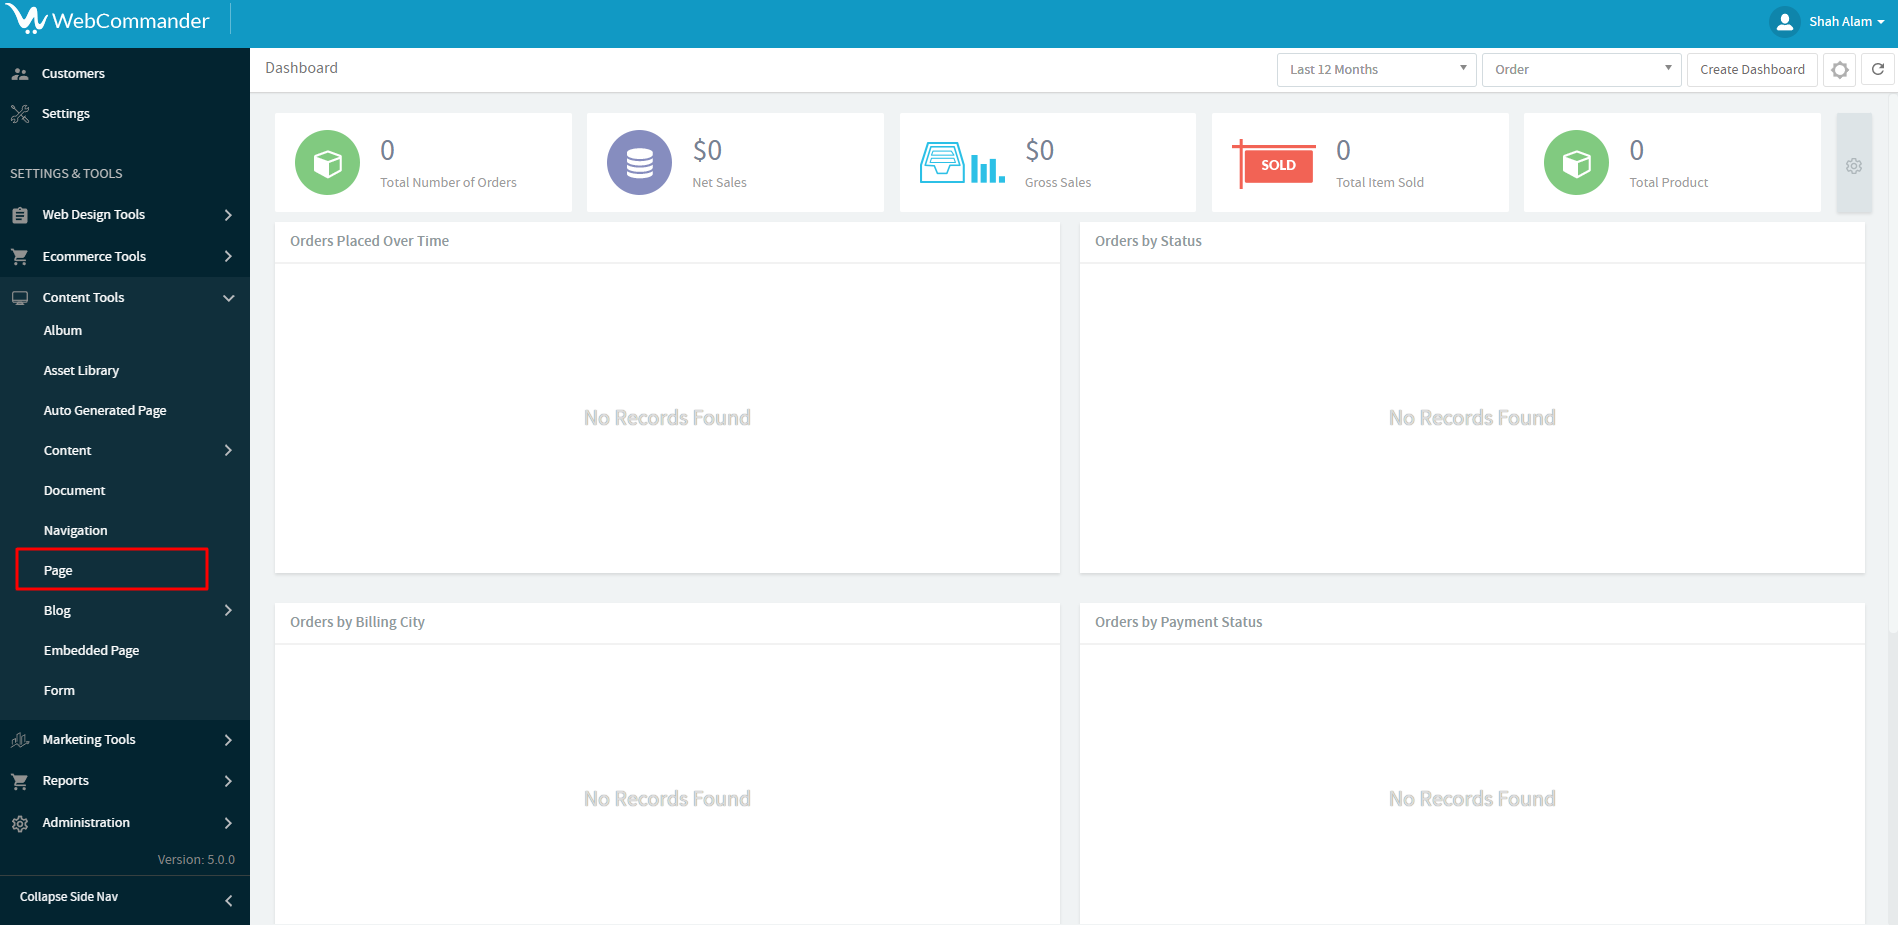
Step 2
- To proceed, choose the “Page” option from the available selections listed under the “Web Content” category.
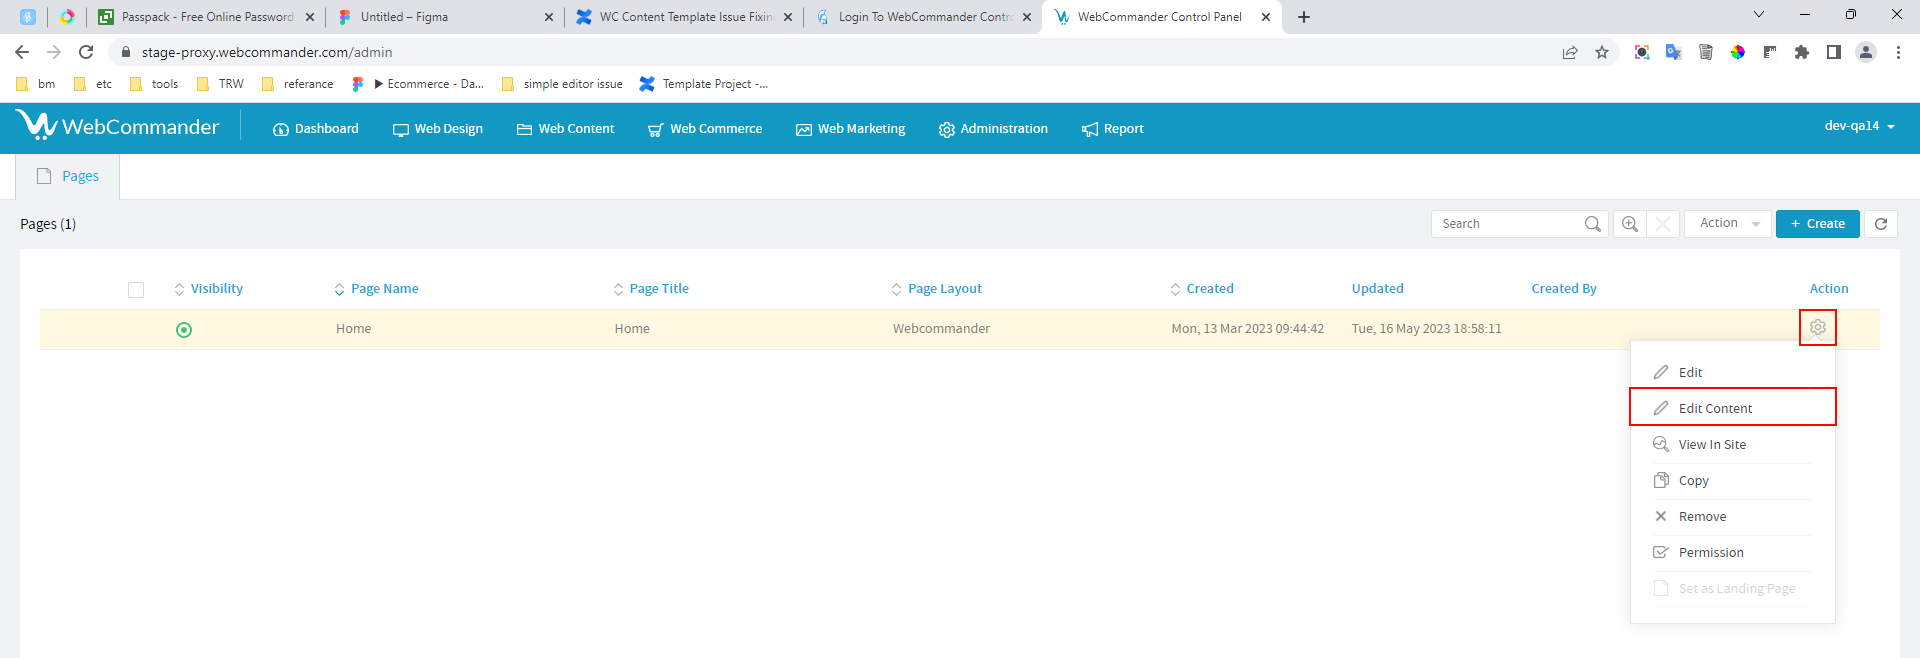
Step 3
- Next, click on the settings button to access the options, and then select “Edit Content” from the menu.
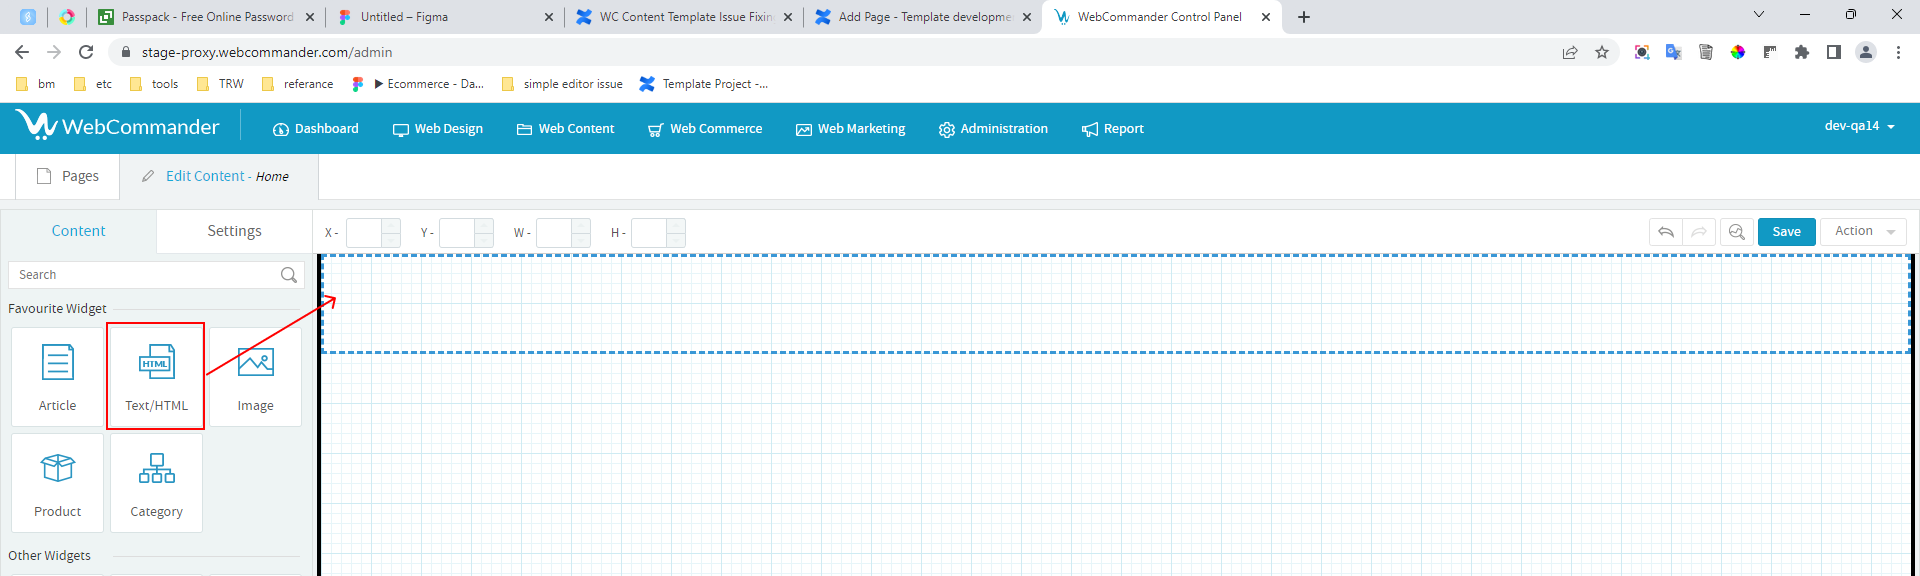
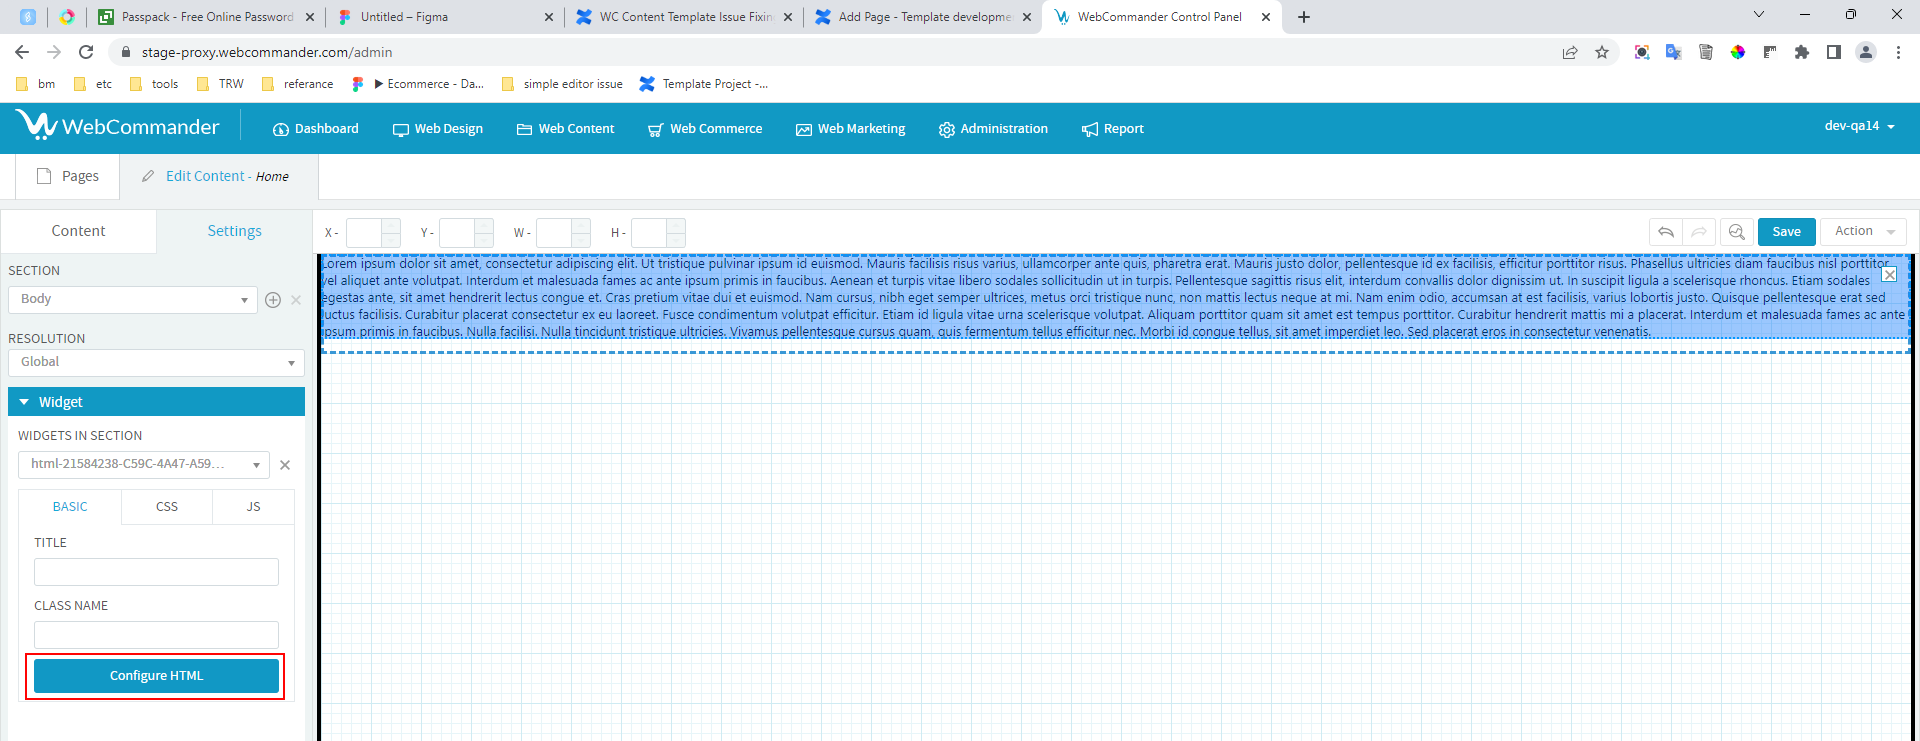
Step 4
- In the page body section, utilise the drag-and-drop feature to place the Text/HTML widget. Move the widget to the desired location by dragging it and dropping it into the page body section.
Step 5
- To proceed, click on the “Configure HTML” button.
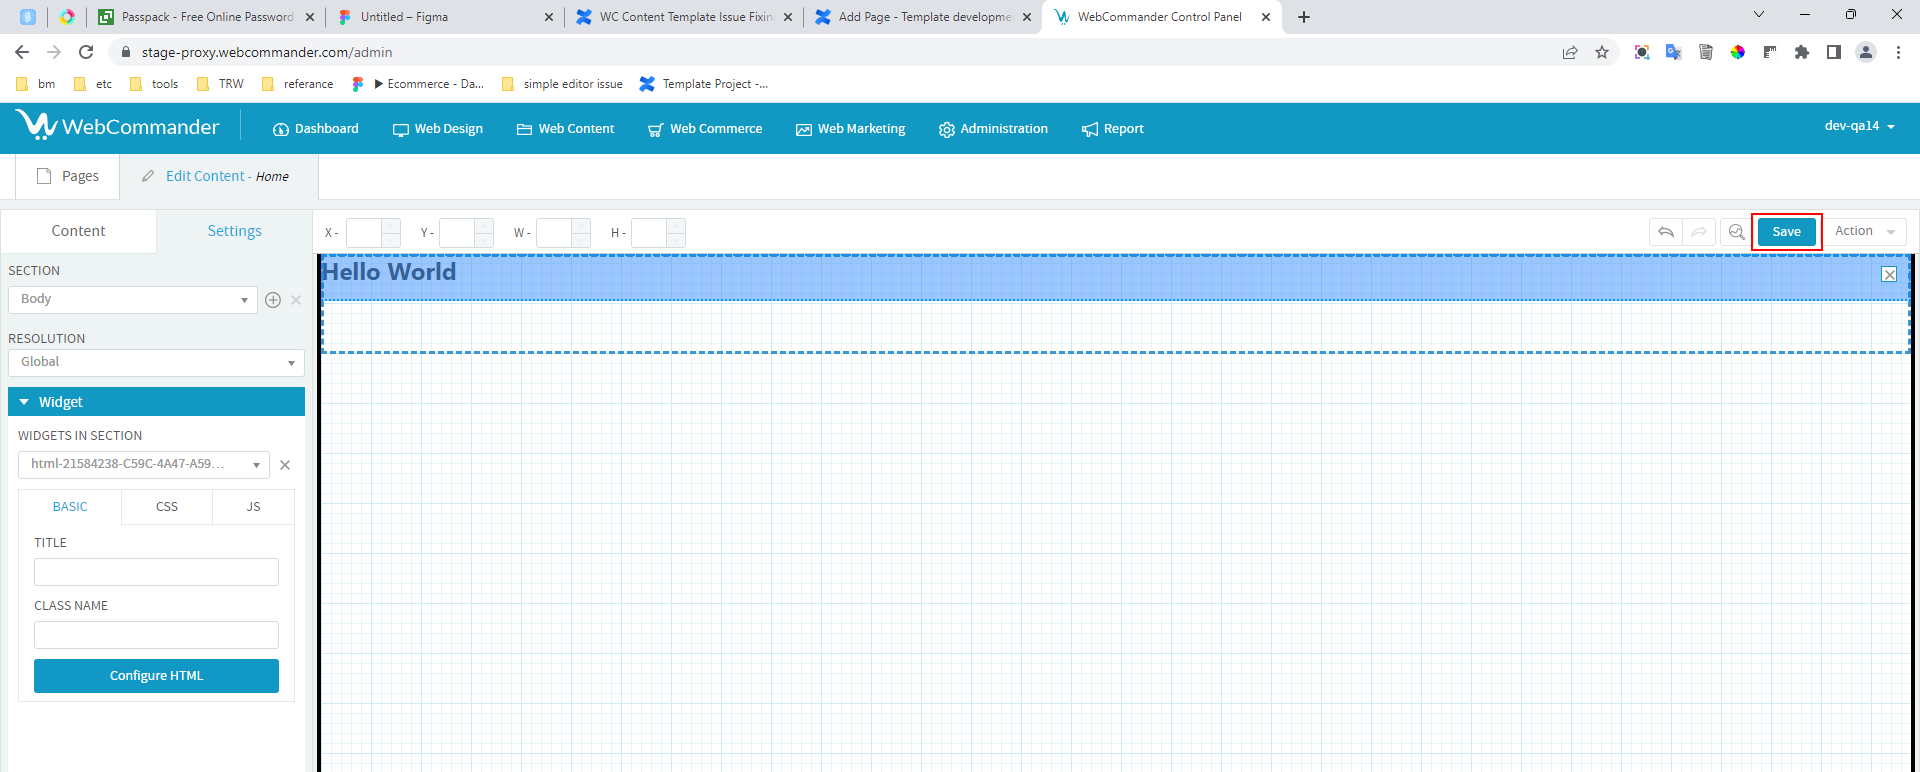
Step 6
- In the Content editor, type “Hello World”. Apply the H1 heading style to the text. Finally, click on the “Update” button to save the changes.

Step 7
- To save the page, click on the “Save” button.
Step 8
- Access the Asset Library from the Web Content menu.
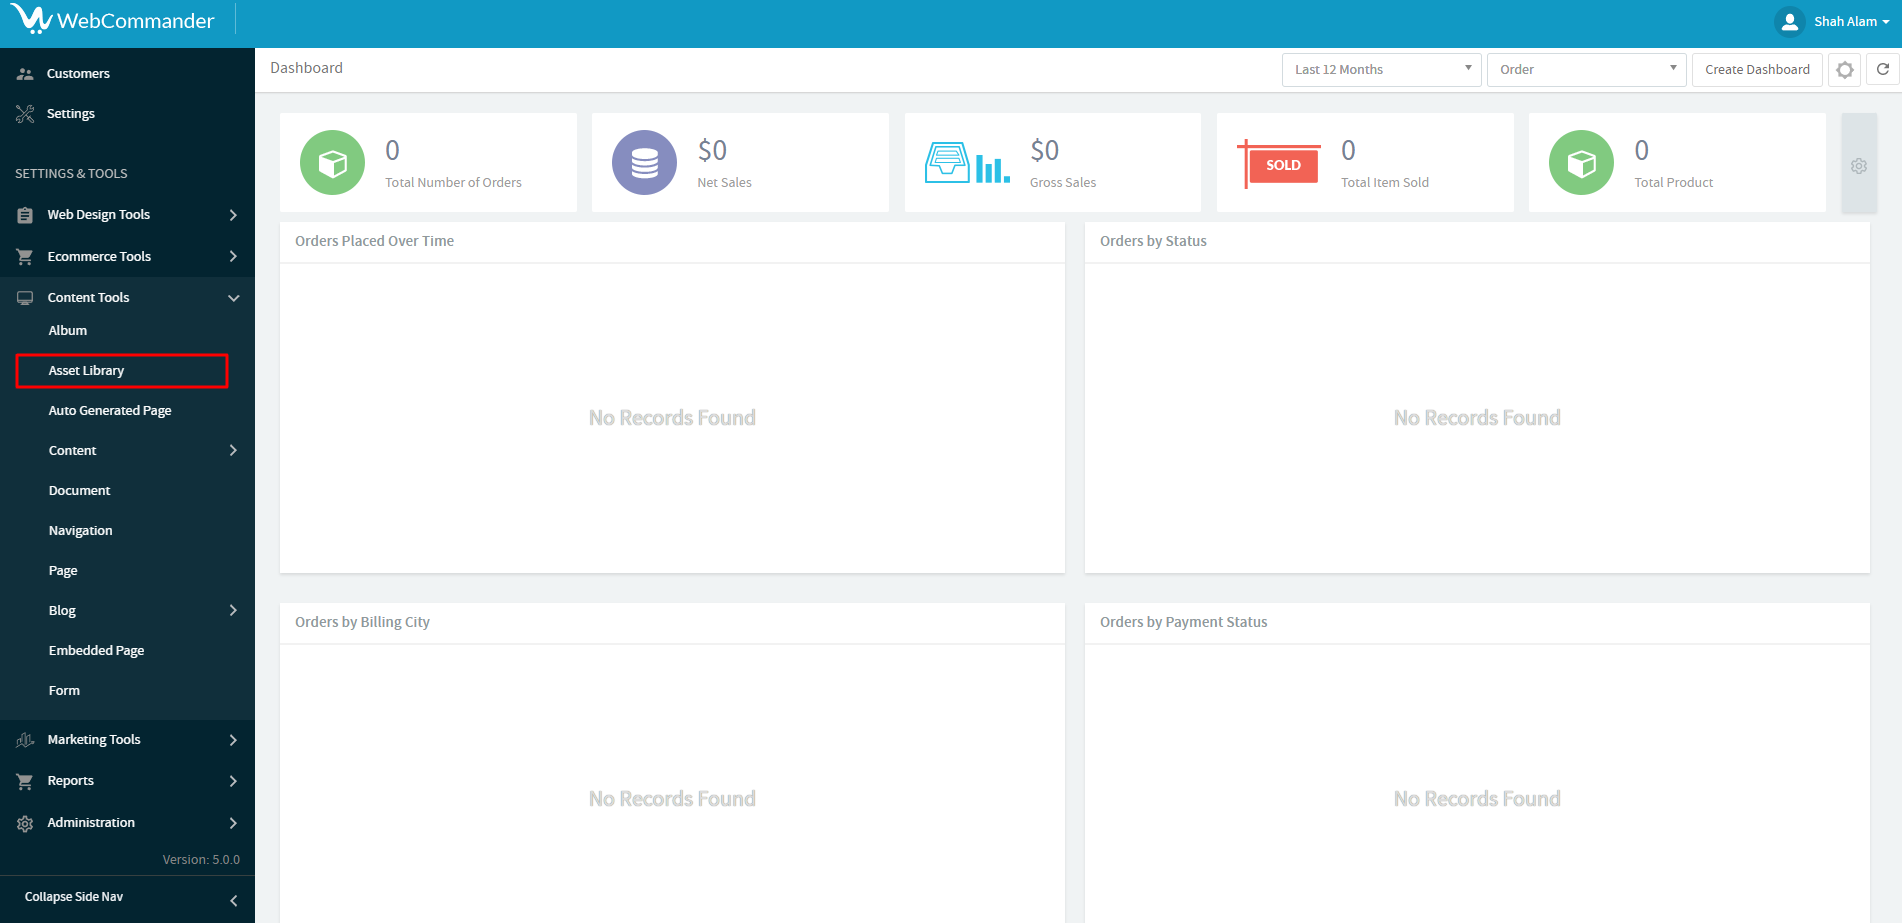
Step 9
- Choose the “Template” option from the dropdown menu.

Step 10
- Click on the options icon and select “New Directory” to create a new directory.
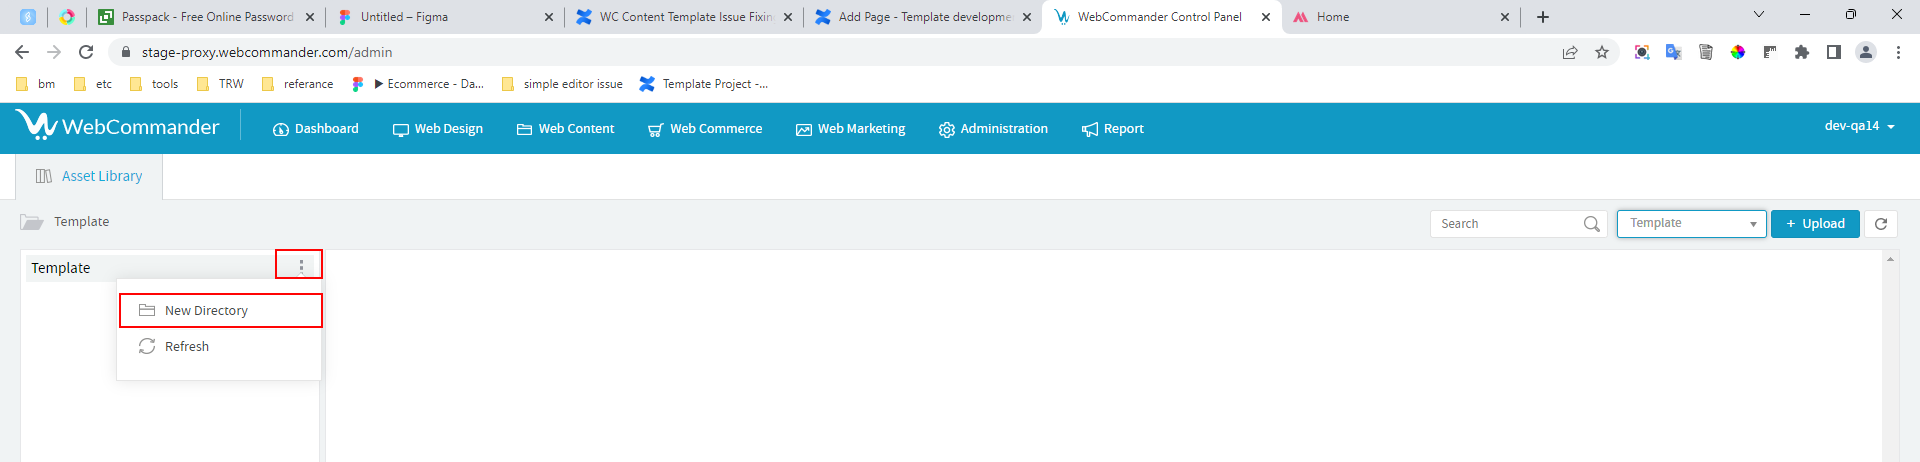
Step 11
- Create a new directory named “CSS”.
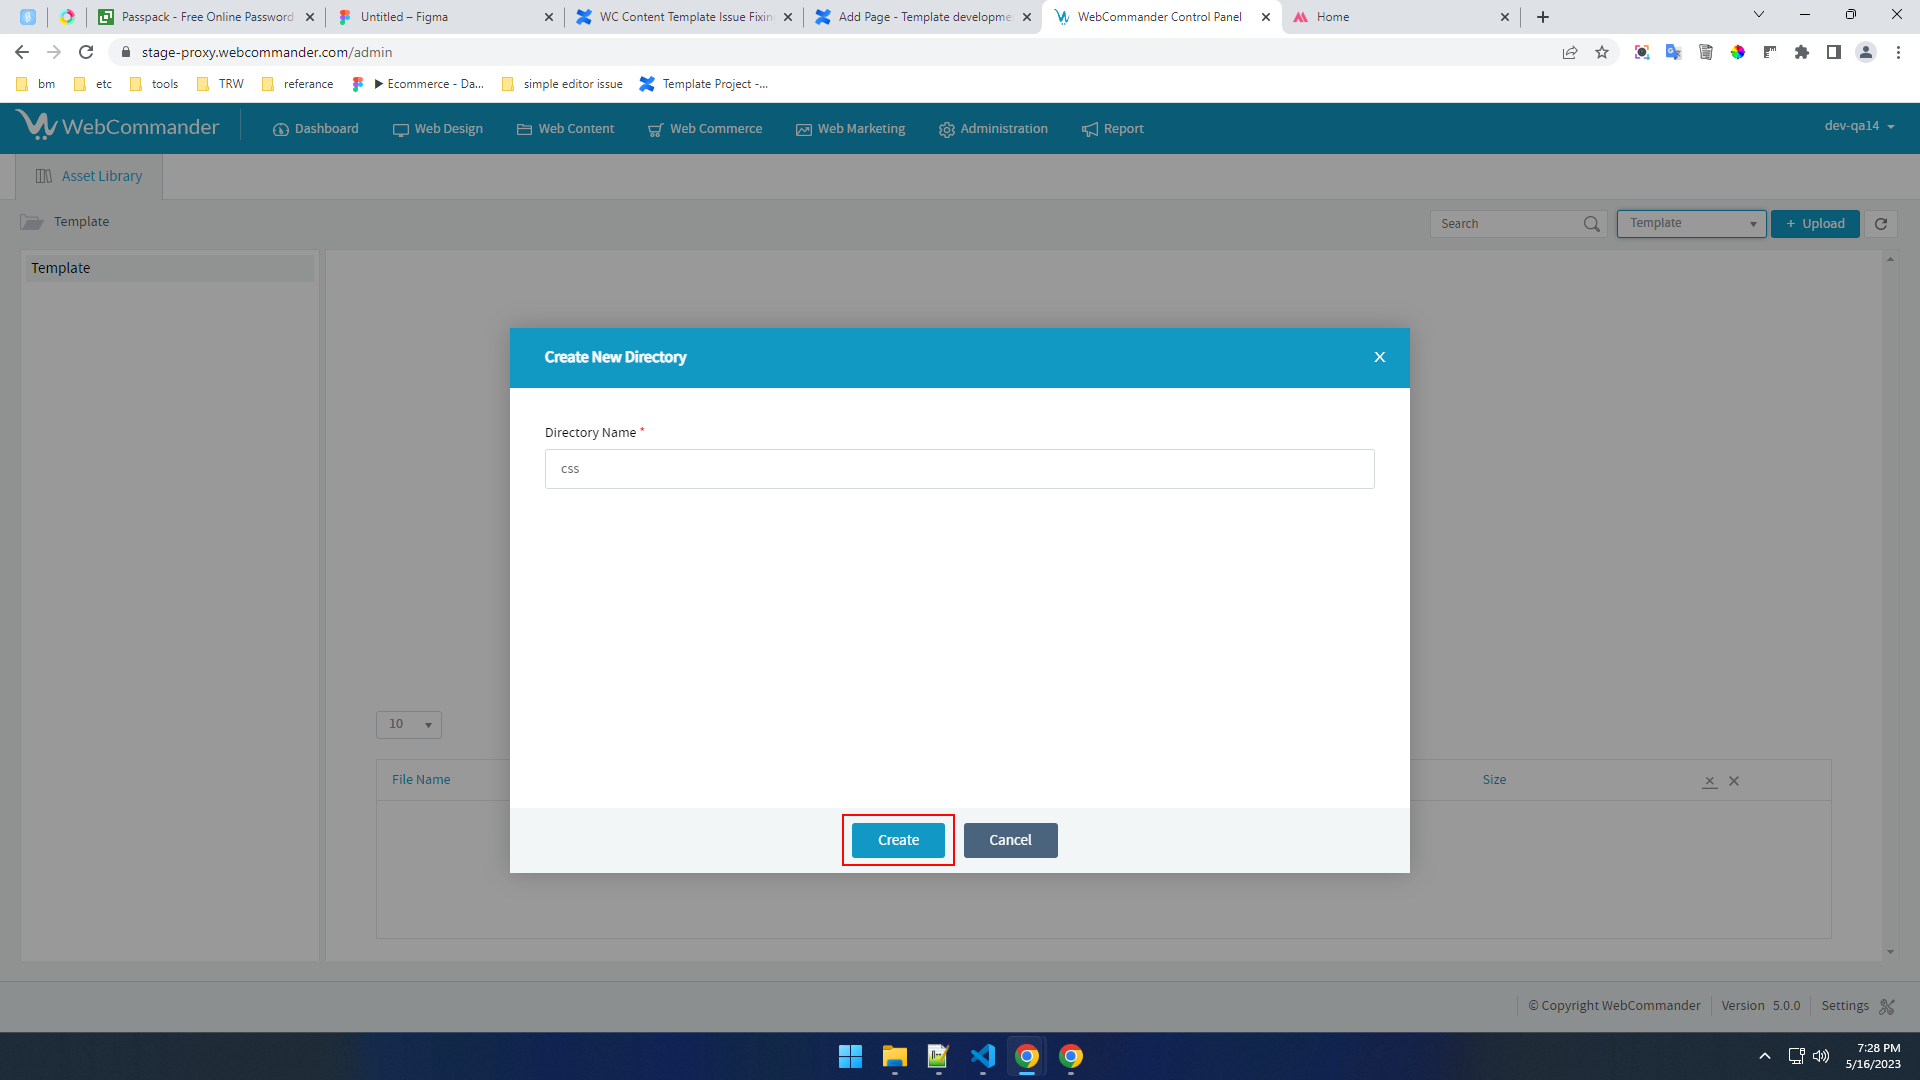
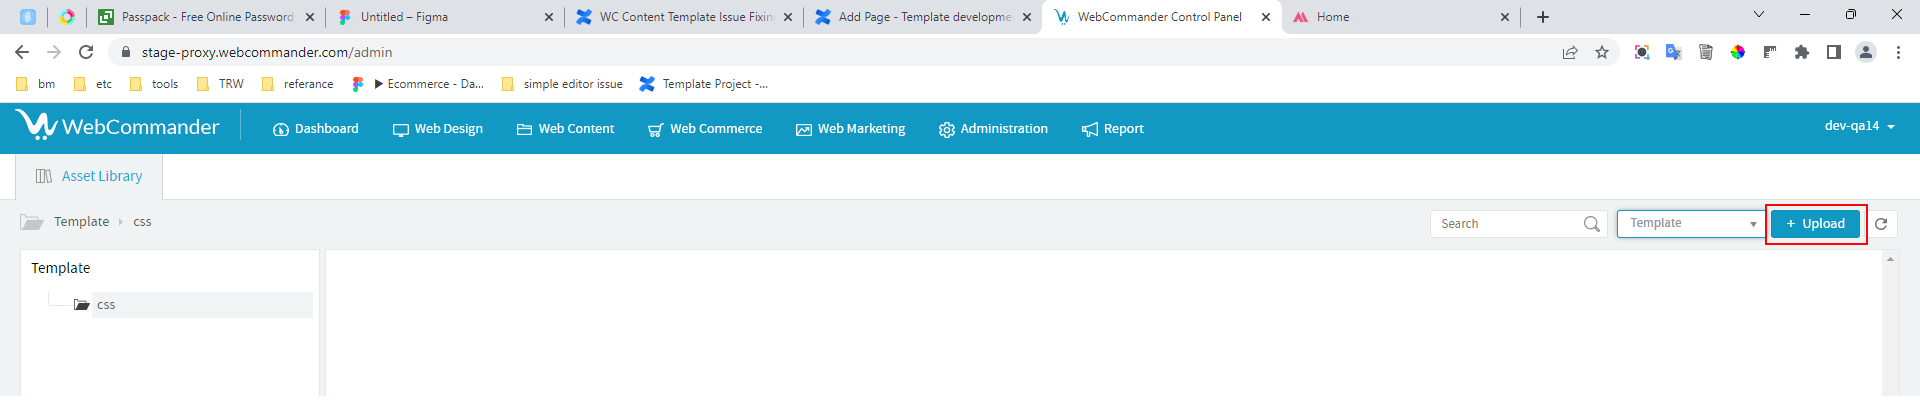
Step 12
- Once you have selected the CSS directory, click on the “Upload” button.
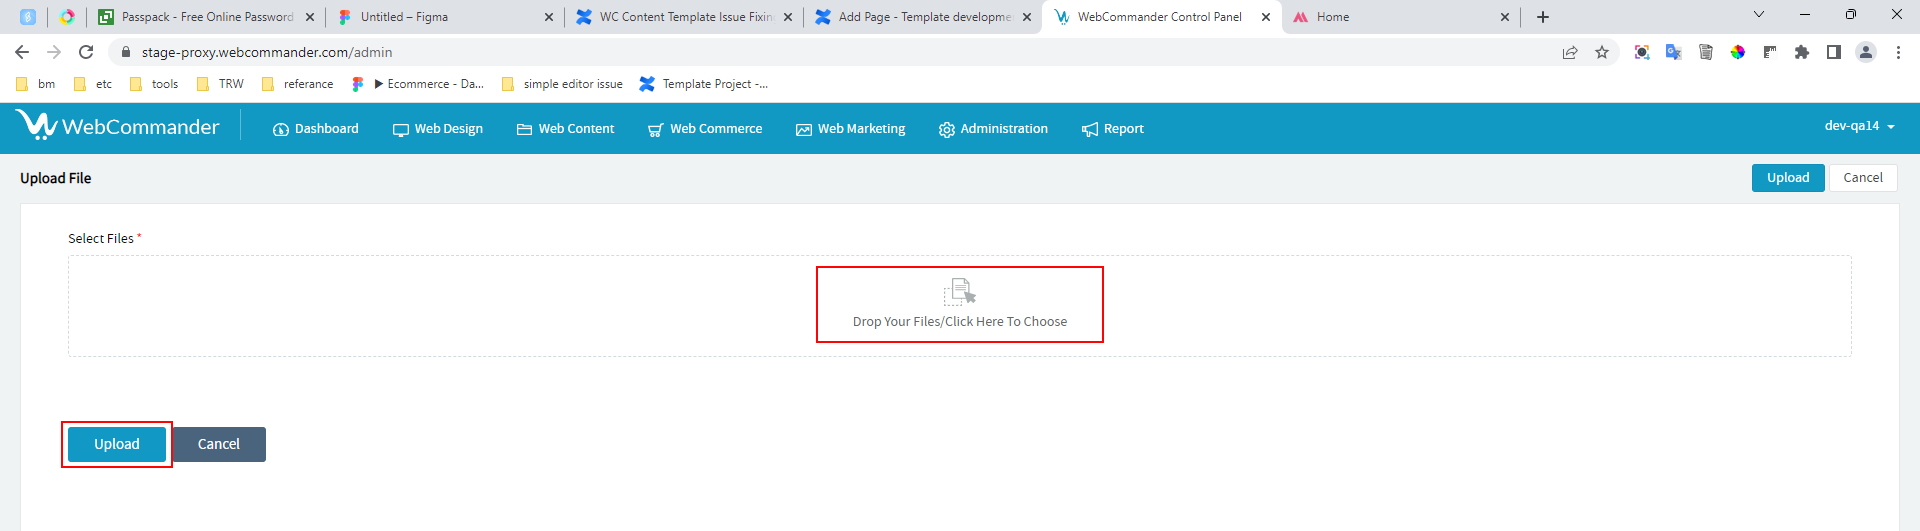
Step 13
- Drag and drop the CSS file into the designated file drop zone. Afterwards, click on the “Upload” button and ensure the file is named “style.css”.
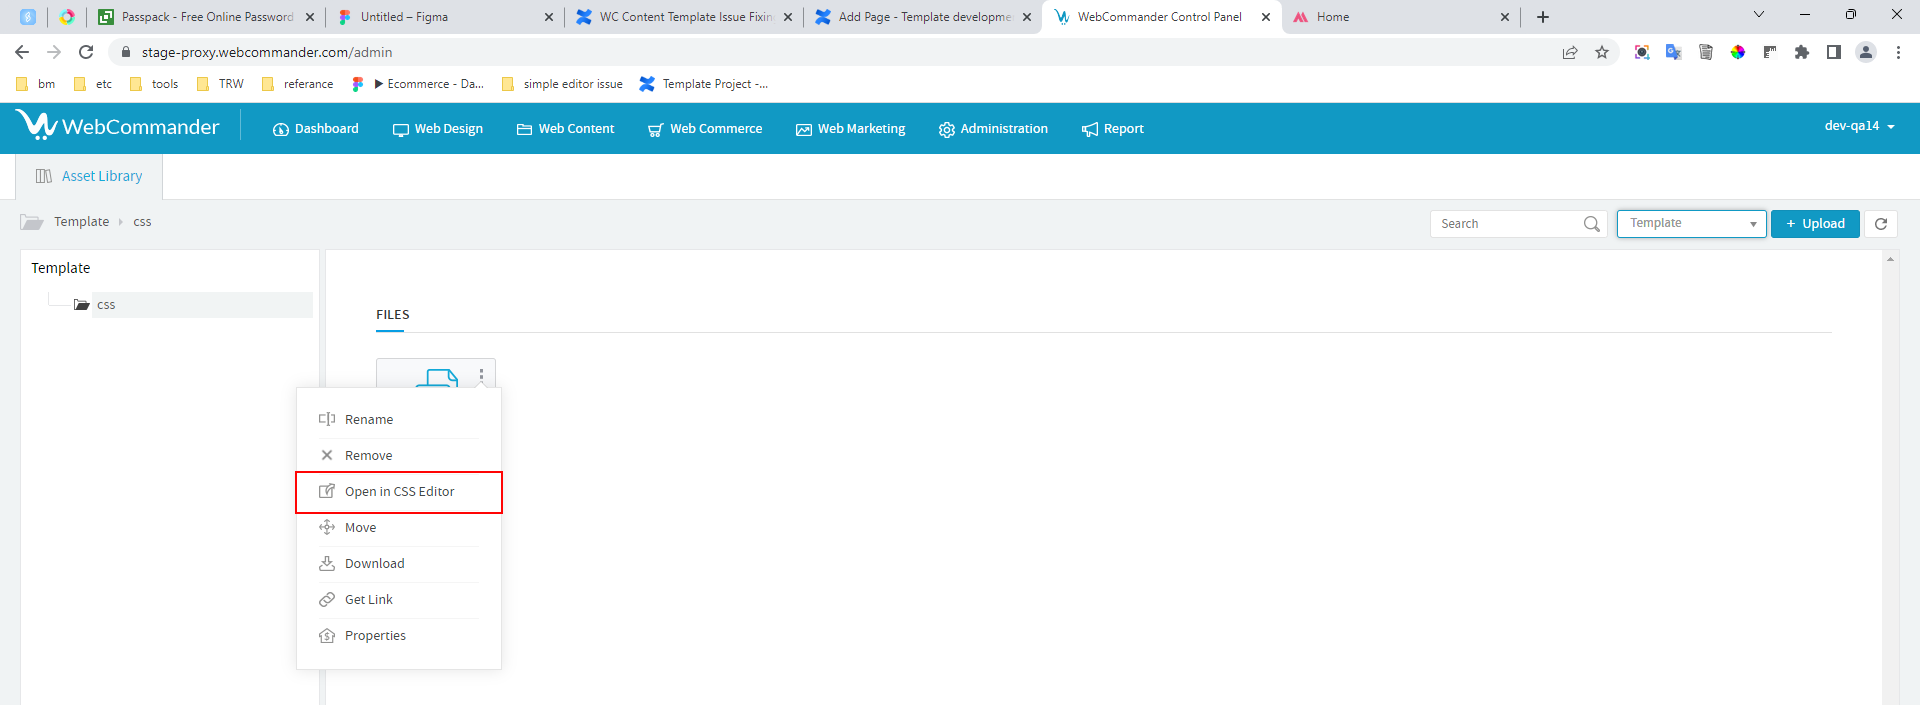
Step 14
- Click on the options icon and choose “Open in CSS Editor” from the available options.
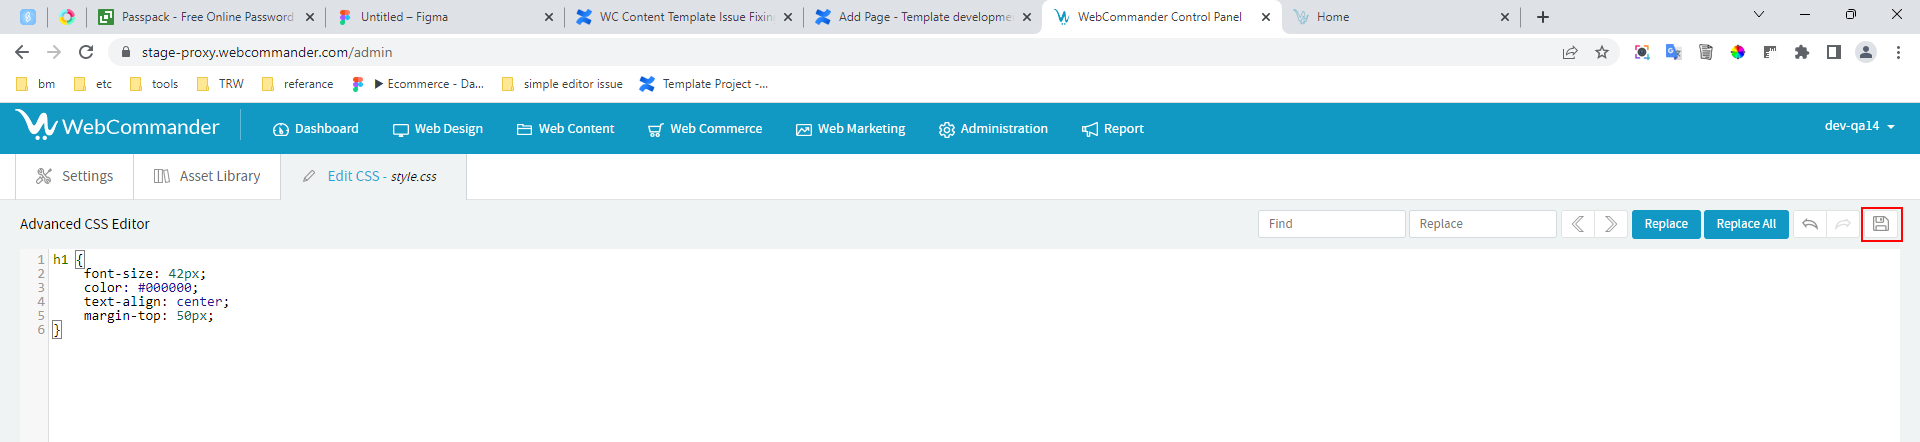
Step 15
- To style the h1 element, enter the desired CSS code in the CSS Editor. Once you have made the necessary changes, click on the “Save” button to save the CSS code.
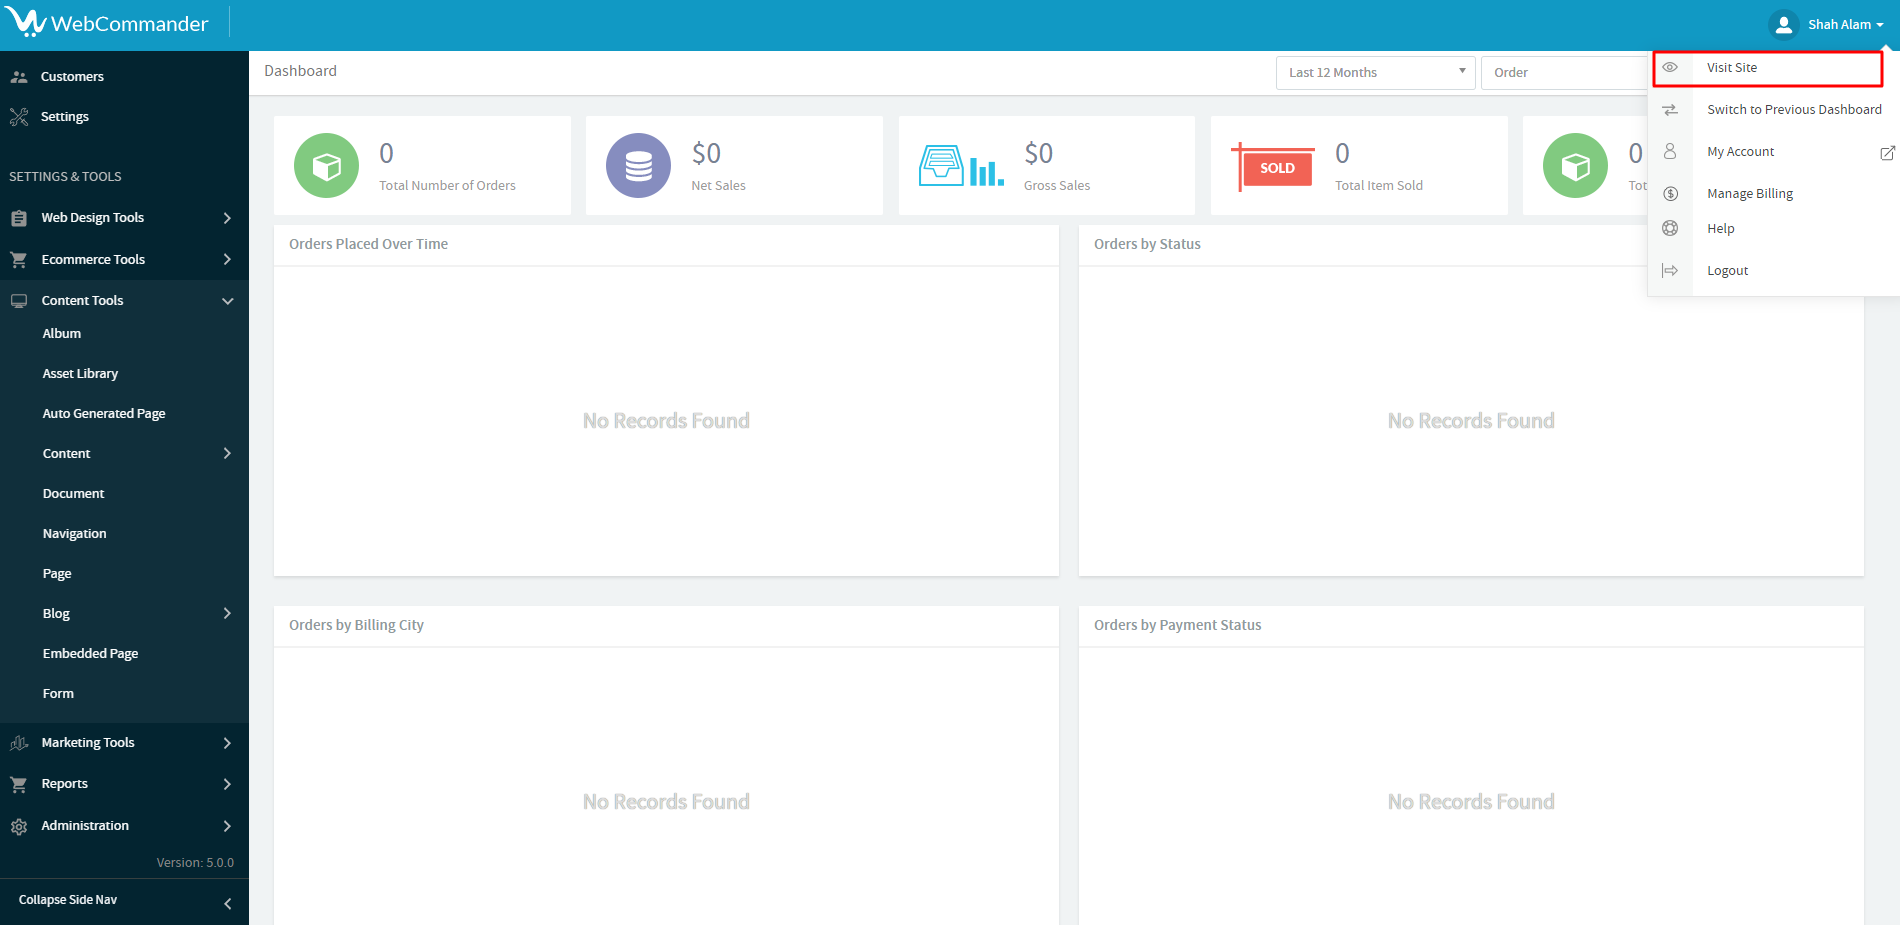
Step 16
- Click on the user profile menu and select “Visit Site” to navigate to the site.
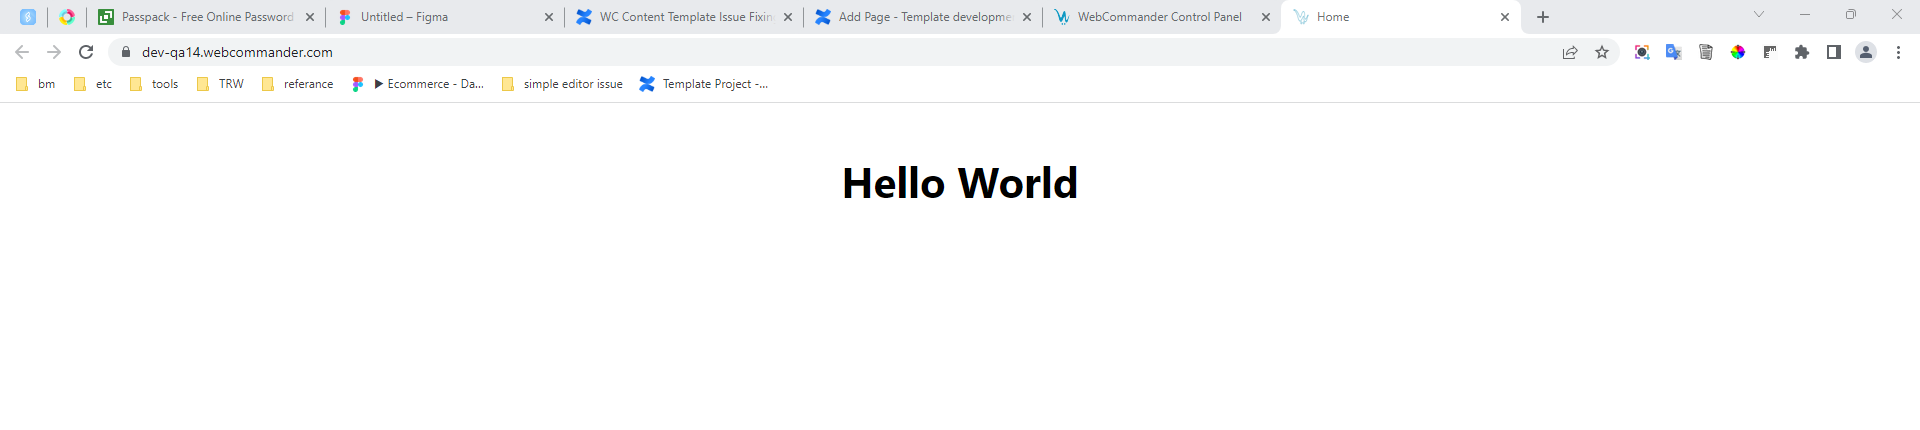
Ultimate Outcome
The landing page of our demo site now displays the text “Hello World” as intended.